[OCI] OKE Cluster 구축(4) - 접속 환경 설정
1. Bastion 서버 생성
1. Name : <적절한 이름 입력>
2. Availability domain : <사용 중인 AD 선택>

3. Image and Shape
a. Image : Oracle Linux 8 선택
b. Shape : <적절한 Shape 및 OCPU, Memory 선택>

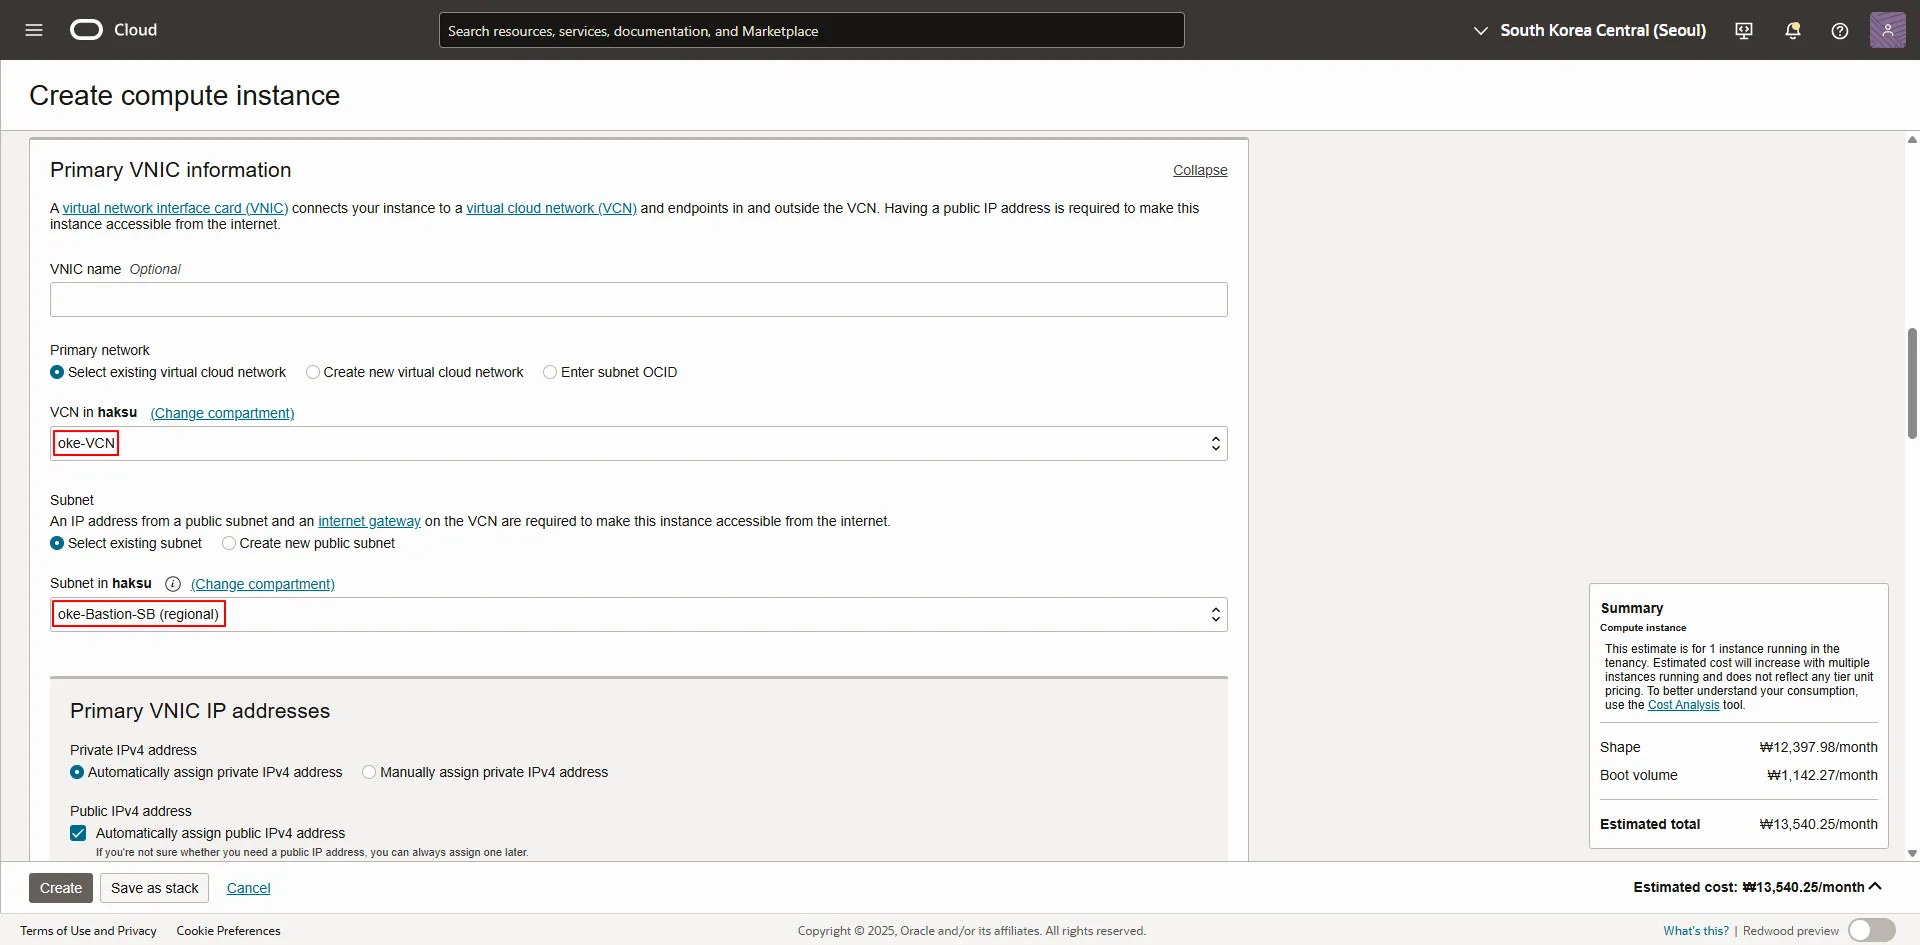
4. Primary VNIC information
a. VCN : <이전 가이드에서 생성한 OKE Cluster VCN 선택>
b. Subnet : <이전 가이드에서 생성한 Bastion용 Subnet 선택>
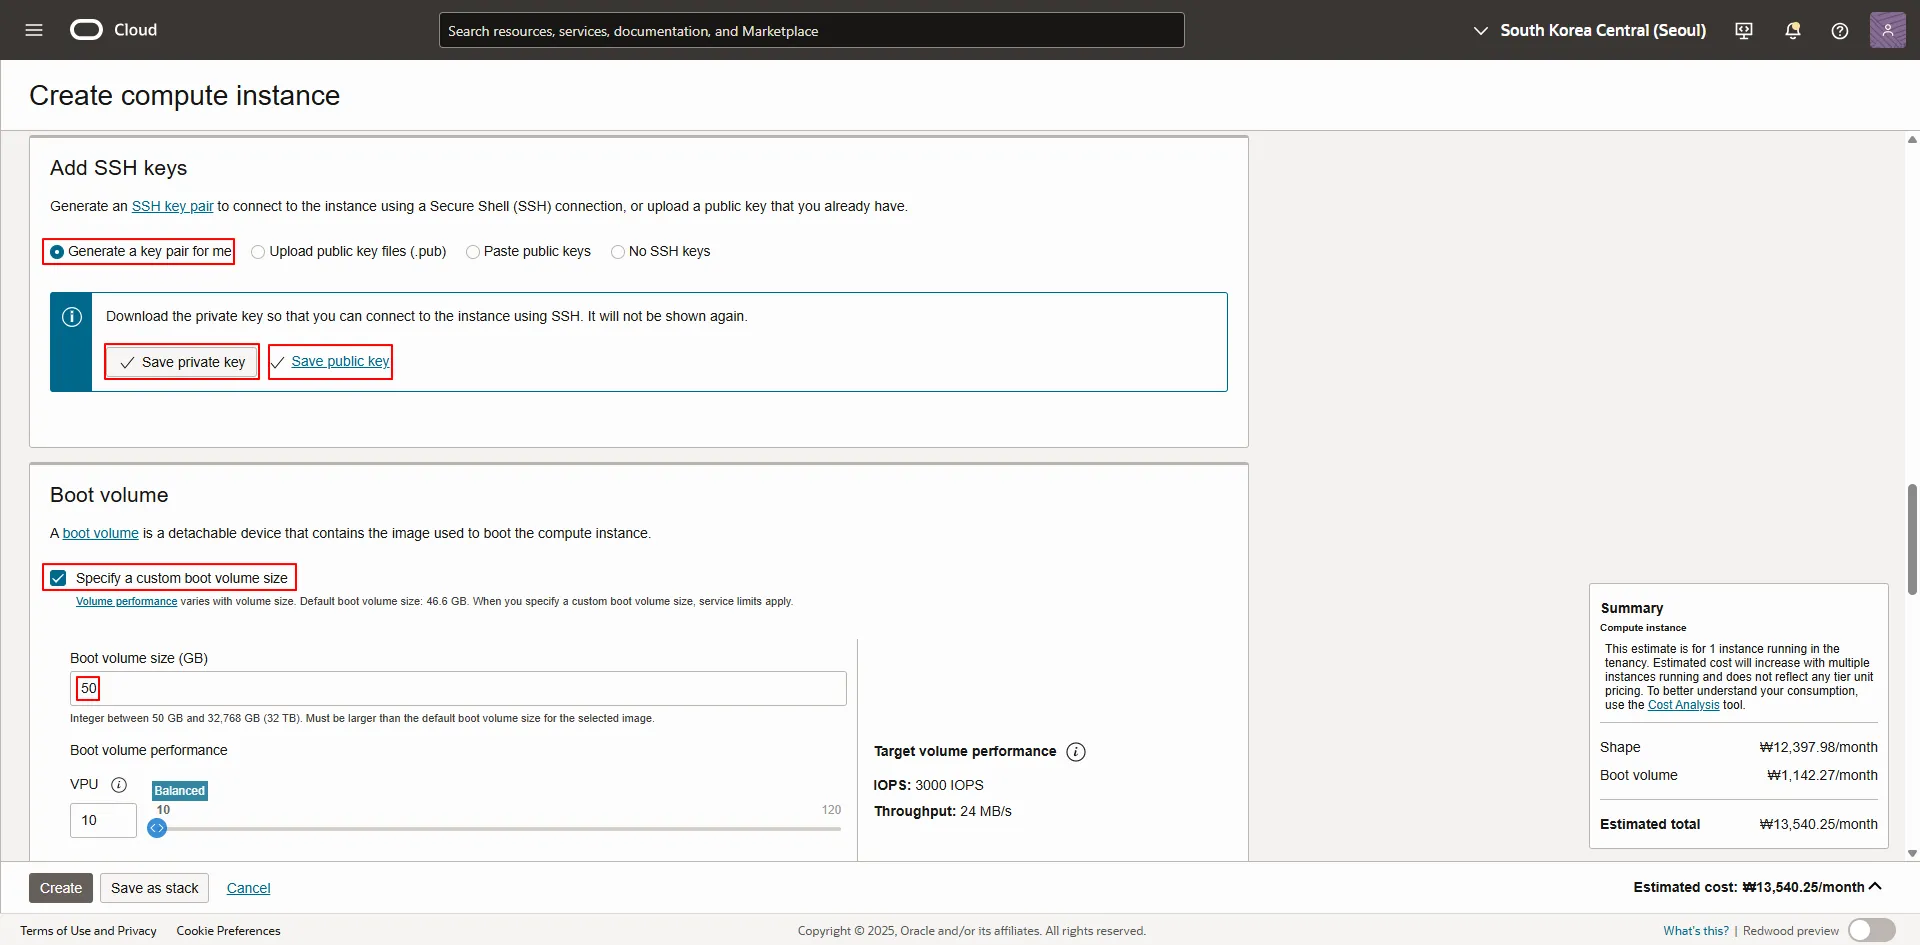
5. Add SSH keys
a. Generate a key pair for me 선택
b. Private key, Public key 다운
6. Boot volume
a. Specify a custom boot volume size 체크
b. Boot volume size : 50 GB
2. Kubernetes 관리자용 유저 생성
2.1. 유저 생성
## 유저 생성
[opc@oke-bastion]$ sudo adduser k8s-admin

## 확인
[opc@oke-bastion]$ cat /etc/passwd | grep k8s-admin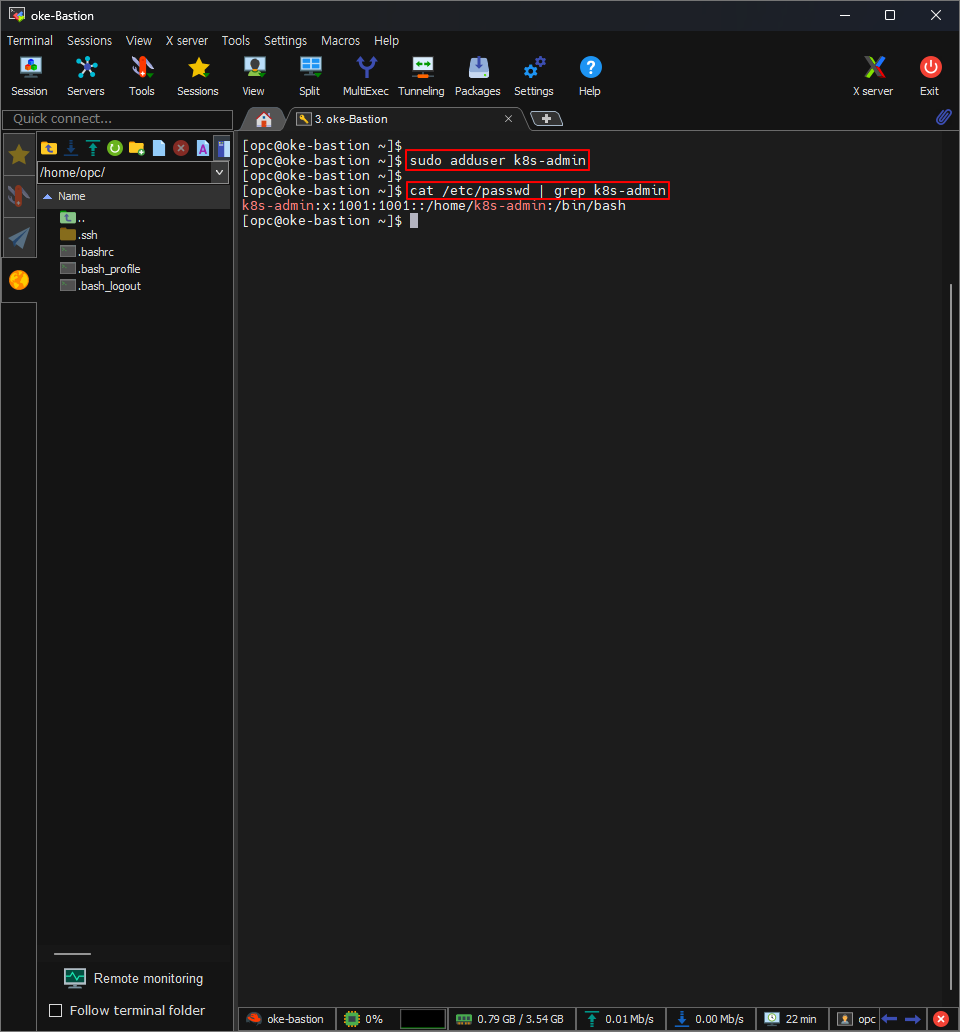
2.2. sudo 권한 부여
## wheel 그룹에 k8s-admin 추가
[opc@oke-bastion ~]$ sudo usermod -aG wheel k8s-admin
## k8s-admin 유저가 속한 그룹 확인
[opc@oke-bastion ~]$ groups k8s-admin
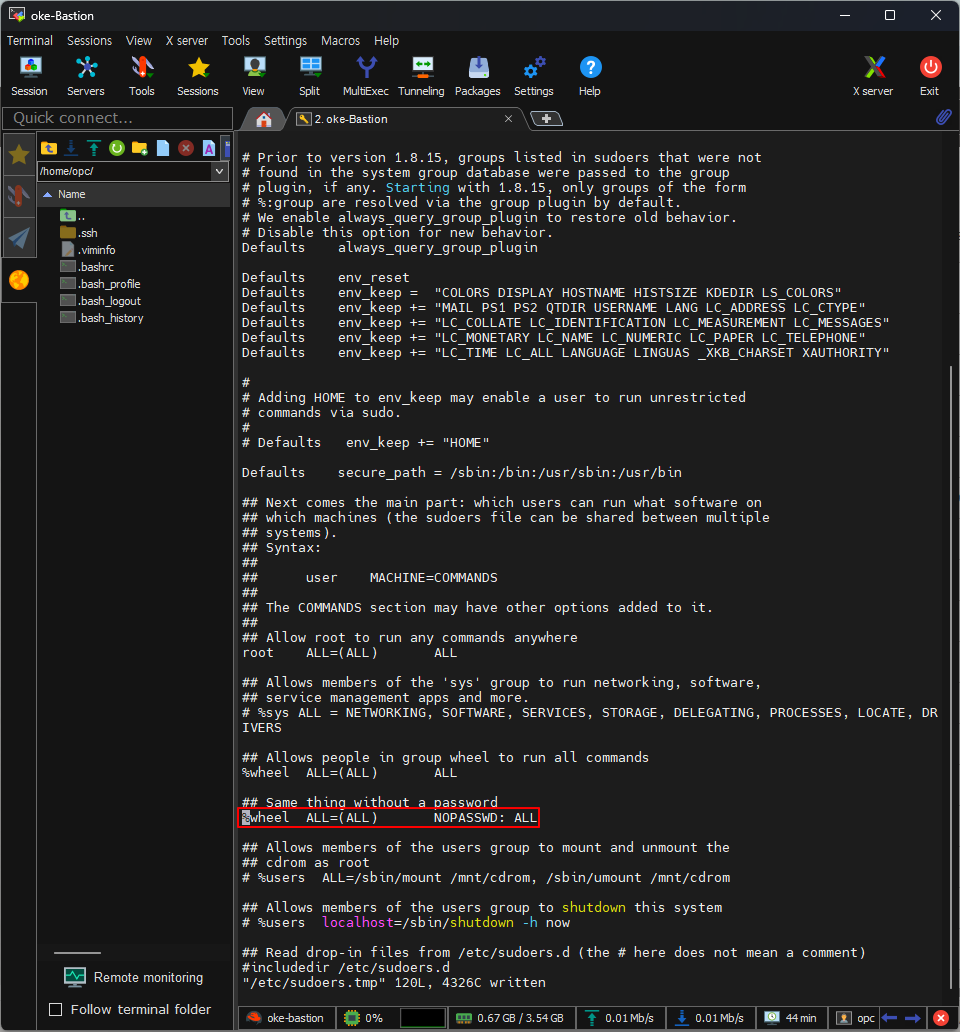
## /etc/sudoers 파일에서 wheel 그룹 활성화
[opc@oke-bastion ~]$ sudo visudo
%wheel ALL=(ALL) NOPASSWD: ALL
2.3. k8s-admin 유저 초기 패스워드 설정
## root 계정 전환
[opc@oke-bastion ~]$ sudo su -

## k8s-admin 유저 패스워드 변경
[root@oke-bastion ~]# passwd k8s-admin
New password: <K8s123!@#>
Retype new password: <K8s123!@#>

## k8s-admin 접속 확인
[root@oke-bastion ~]# exit
[opc@oke-bastion ~]$ su - k8s-admin
Password: <K8s123!@#>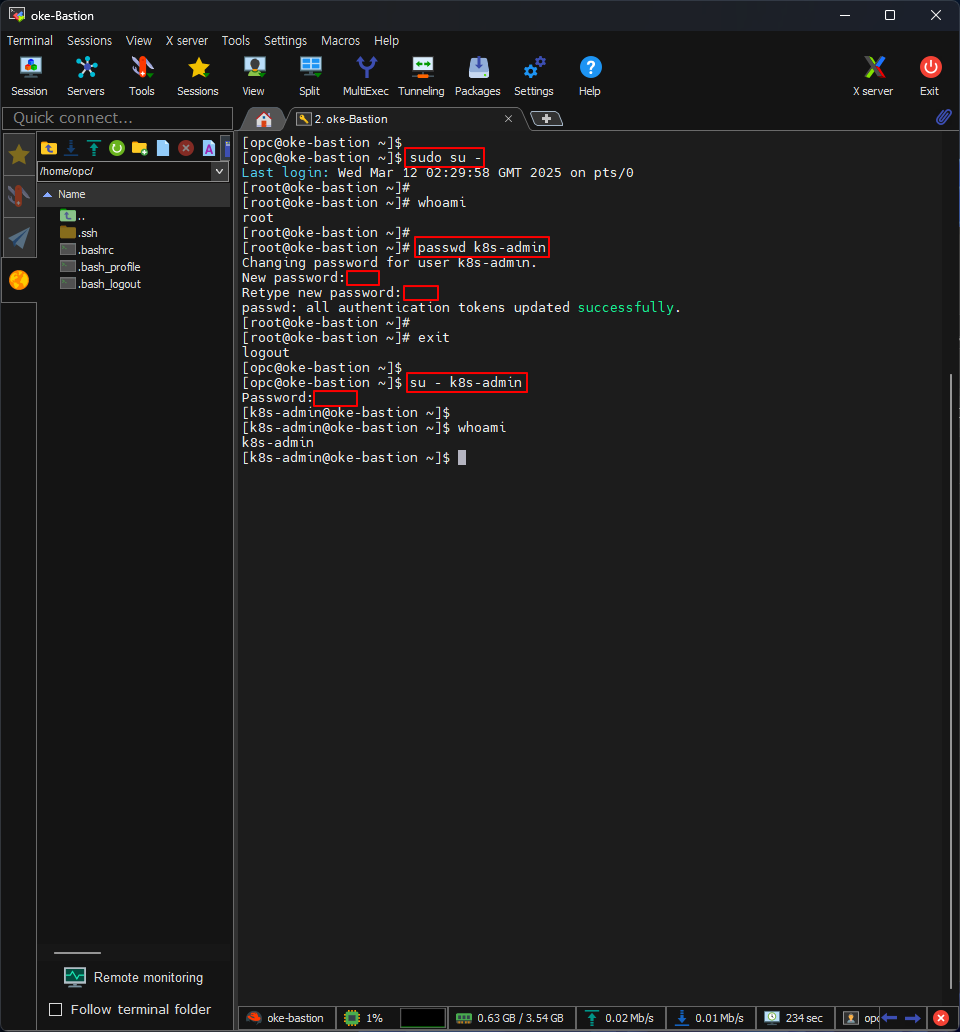
3. OCI CLI
3.1. OCI CLI 설치
## k8s-admin 유저 전환
[opc@oke-bastion ~]$ su - k8s-admin

## 설치된 Python 버전 확인
[k8s-admin@oke-bastion ~]# python3 --version

## Python 버전에 맞는 OCI CLI 설치
[k8s-admin@oke-bastion ~]$ sudo yum install -y python36-oci-cli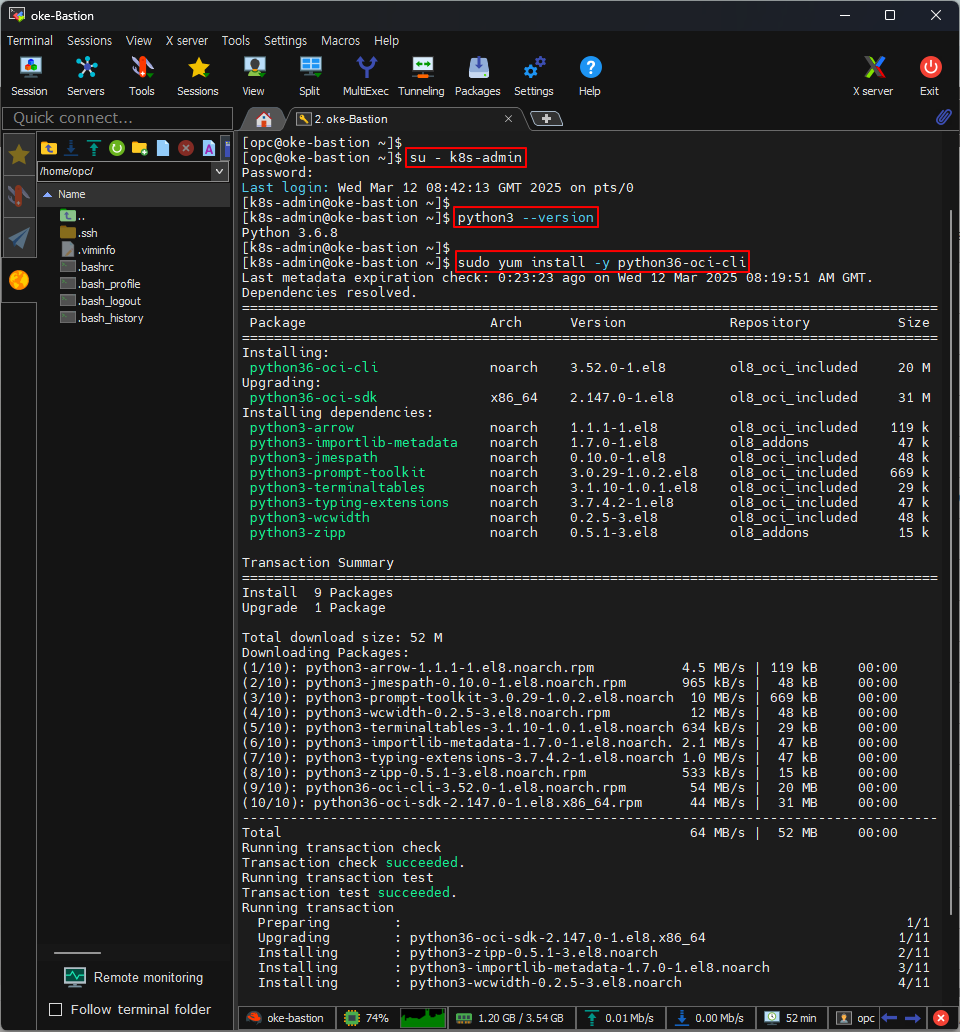
3.2. OCI CLI 접속 정보 설정 (API Key 생성)
[k8s-admin@oke-bastion ~]$ oci setup config
Enter a location for your config [/home/k8s-admin/.oci/config]: <Enter 입력>
Enter a user OCID: <User OCID 입력>
Enter a tenancy OCID: <Tenancy OCID 입력>
Enter a region by index or name(e.g.
1: af-johannesburg-1, 2: ap-chiyoda-1, 3: ap-chuncheon-1, 4: ap-chuncheon-2, 5: ap-dcc-canberra-1,
6: ap-dcc-gazipur-1, 7: ap-hyderabad-1, 8: ap-ibaraki-1, 9: ap-melbourne-1, 10: ap-mumbai-1,
11: ap-osaka-1, 12: ap-seoul-1, 13: ap-seoul-2, 14: ap-singapore-1, 15: ap-singapore-2,
...
71: us-sanjose-1, 72: us-somerset-1, 73: us-thames-1): ap-seoul-1
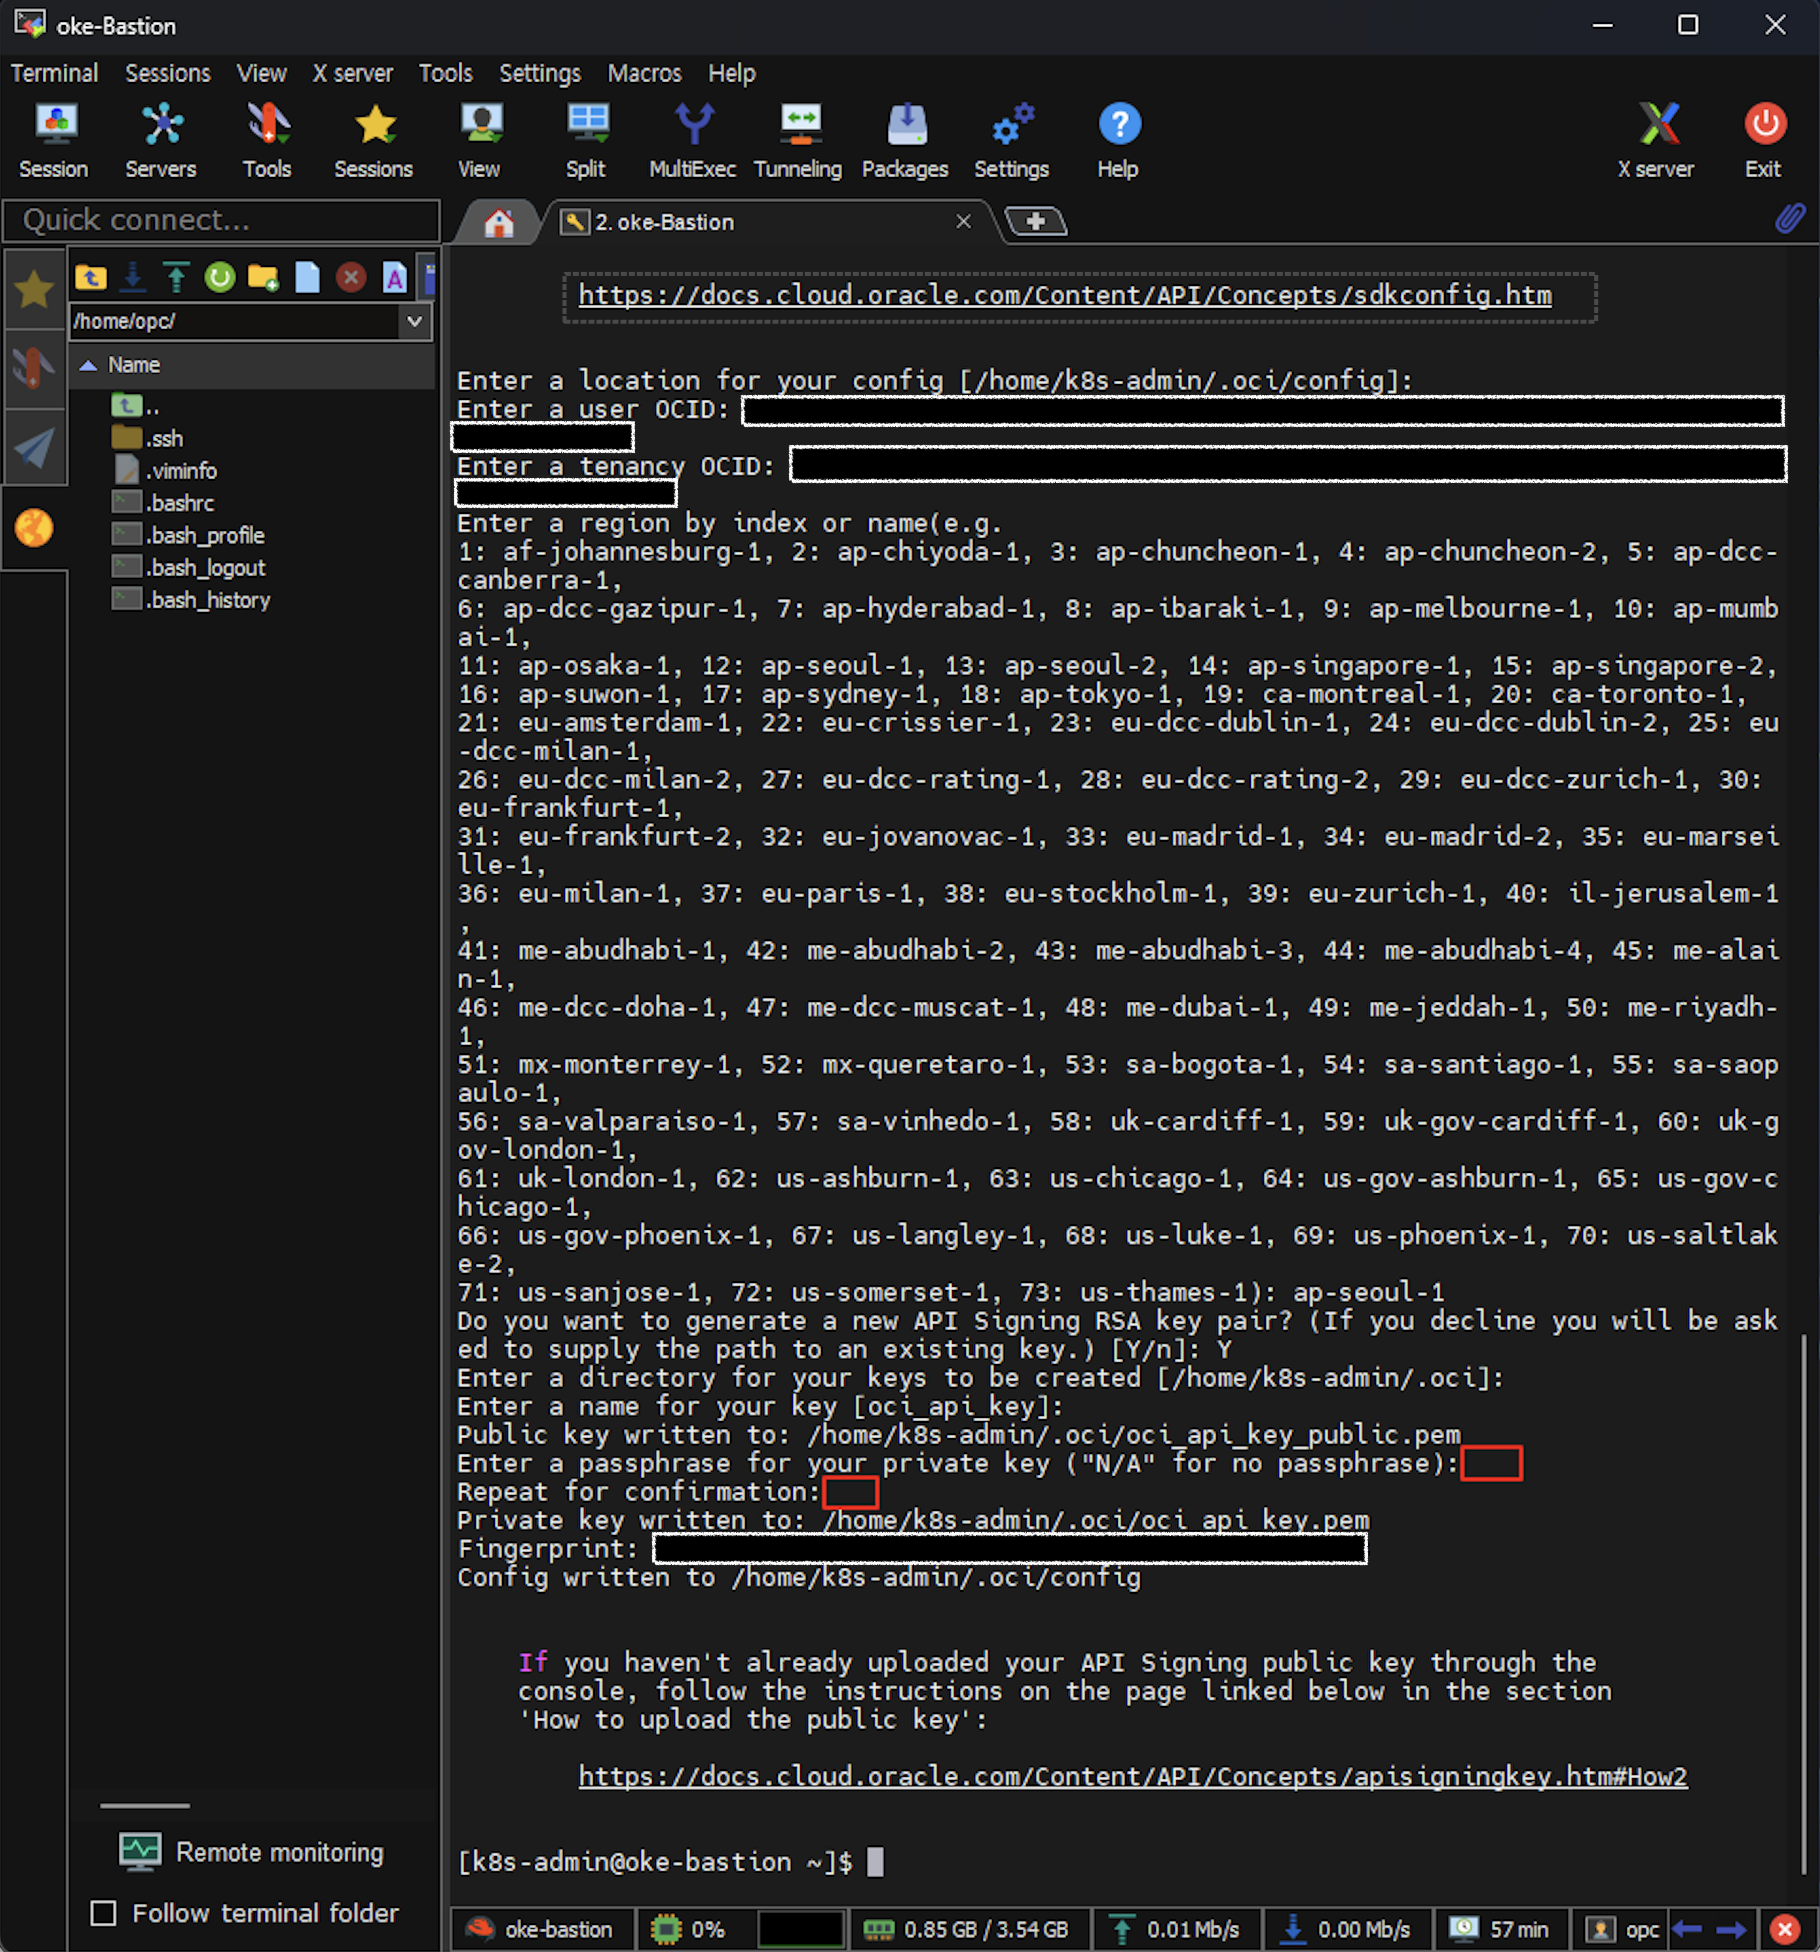
Do you want to generate a new API Signing RSA key pair? (If you decline you will be asked to supply the path to an existing key.) [Y/n]: Y
Enter a directory for your keys to be created [/home/k8s-admin/.oci]: <Enter 입력>
Enter a name for your key [oci_api_key]: <Enter 입력>
Public key written to: /home/k8s-admin/.oci/oci_api_key_public.pem
Enter a passphrase for your private key ("N/A" for no passphrase): <N/A 입력>
Repeat for confirmation: <N/A 입력>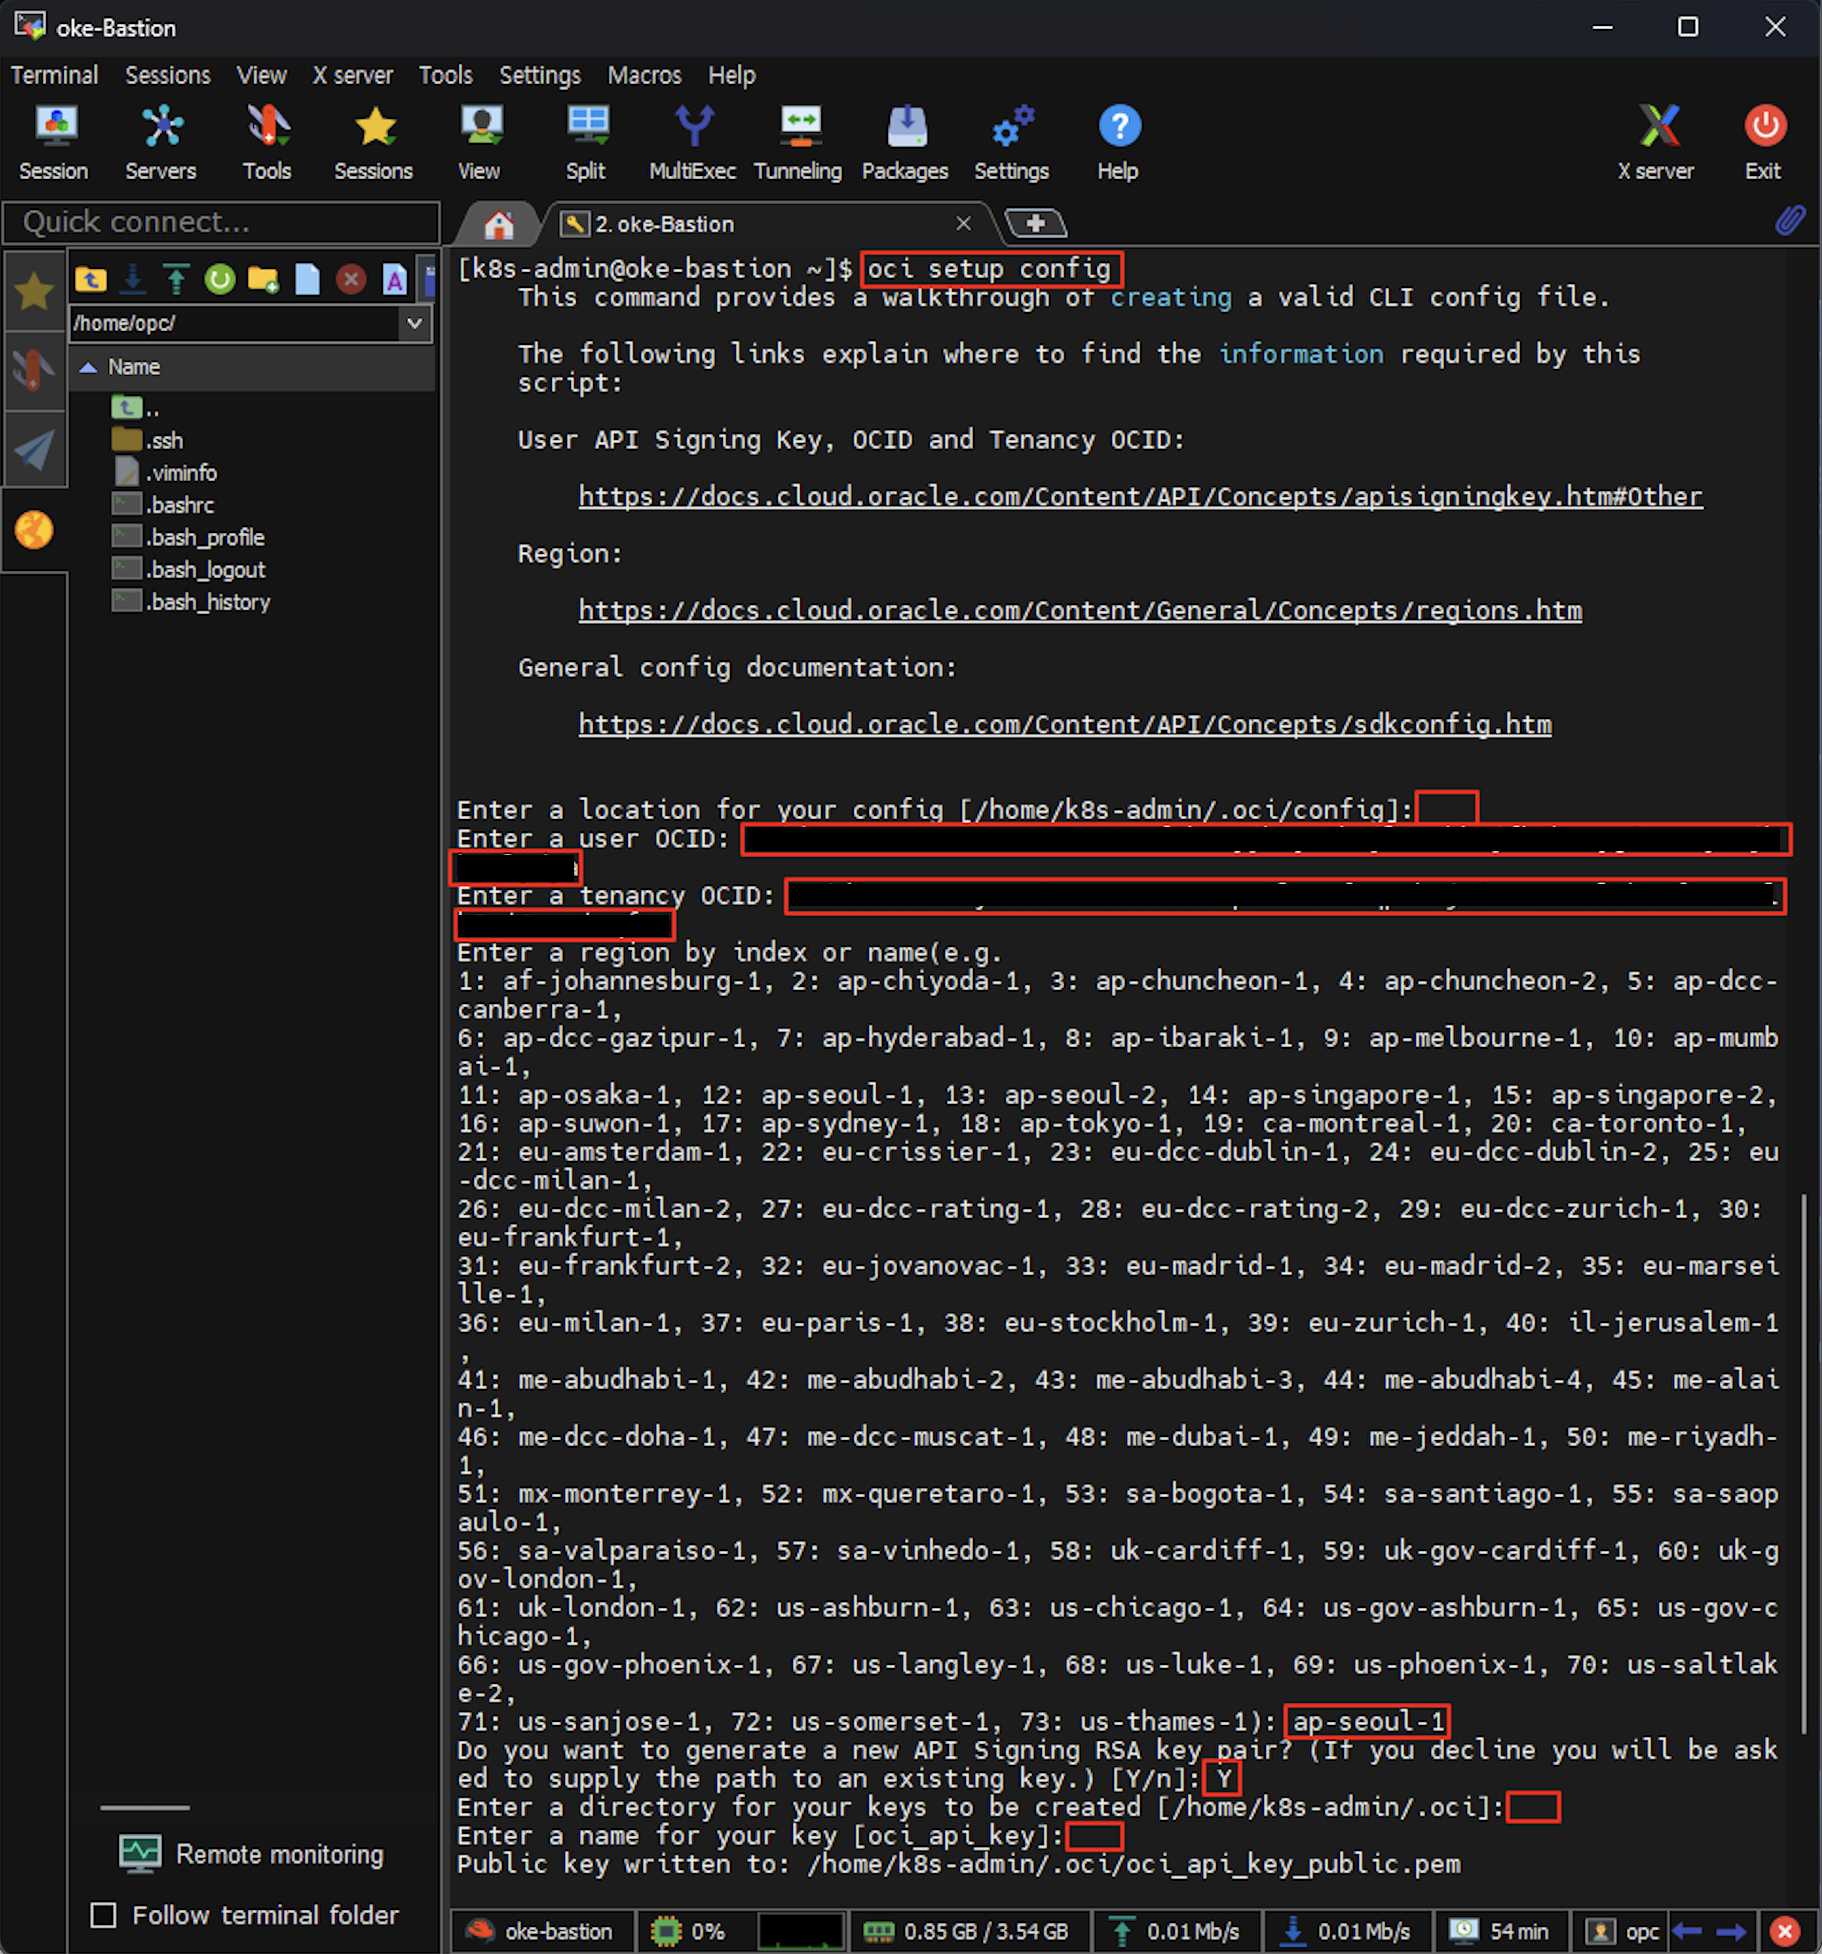
User OCID 확인
1. 테넌시 우측 상단 Profile -> 계정명 or User setting 클릭
2. User informaion -> OCID 복사
Tenancy OCID 확인
1. 테넌시 우측 상단 Profile -> '테넌시: <테넌시명>' 클릭
2. Tenacy information -> OCID 복사
2.3. OCI Console API key 등록
1. 생성한 API Key 확인
## API Key가 생성된 경로로 이동
[k8s-admin@oke-bastion ~]# cd .oci

## API Public Key 복사
[k8s-admin@oke-bastion .oci]# cat oci_api_key_public.pem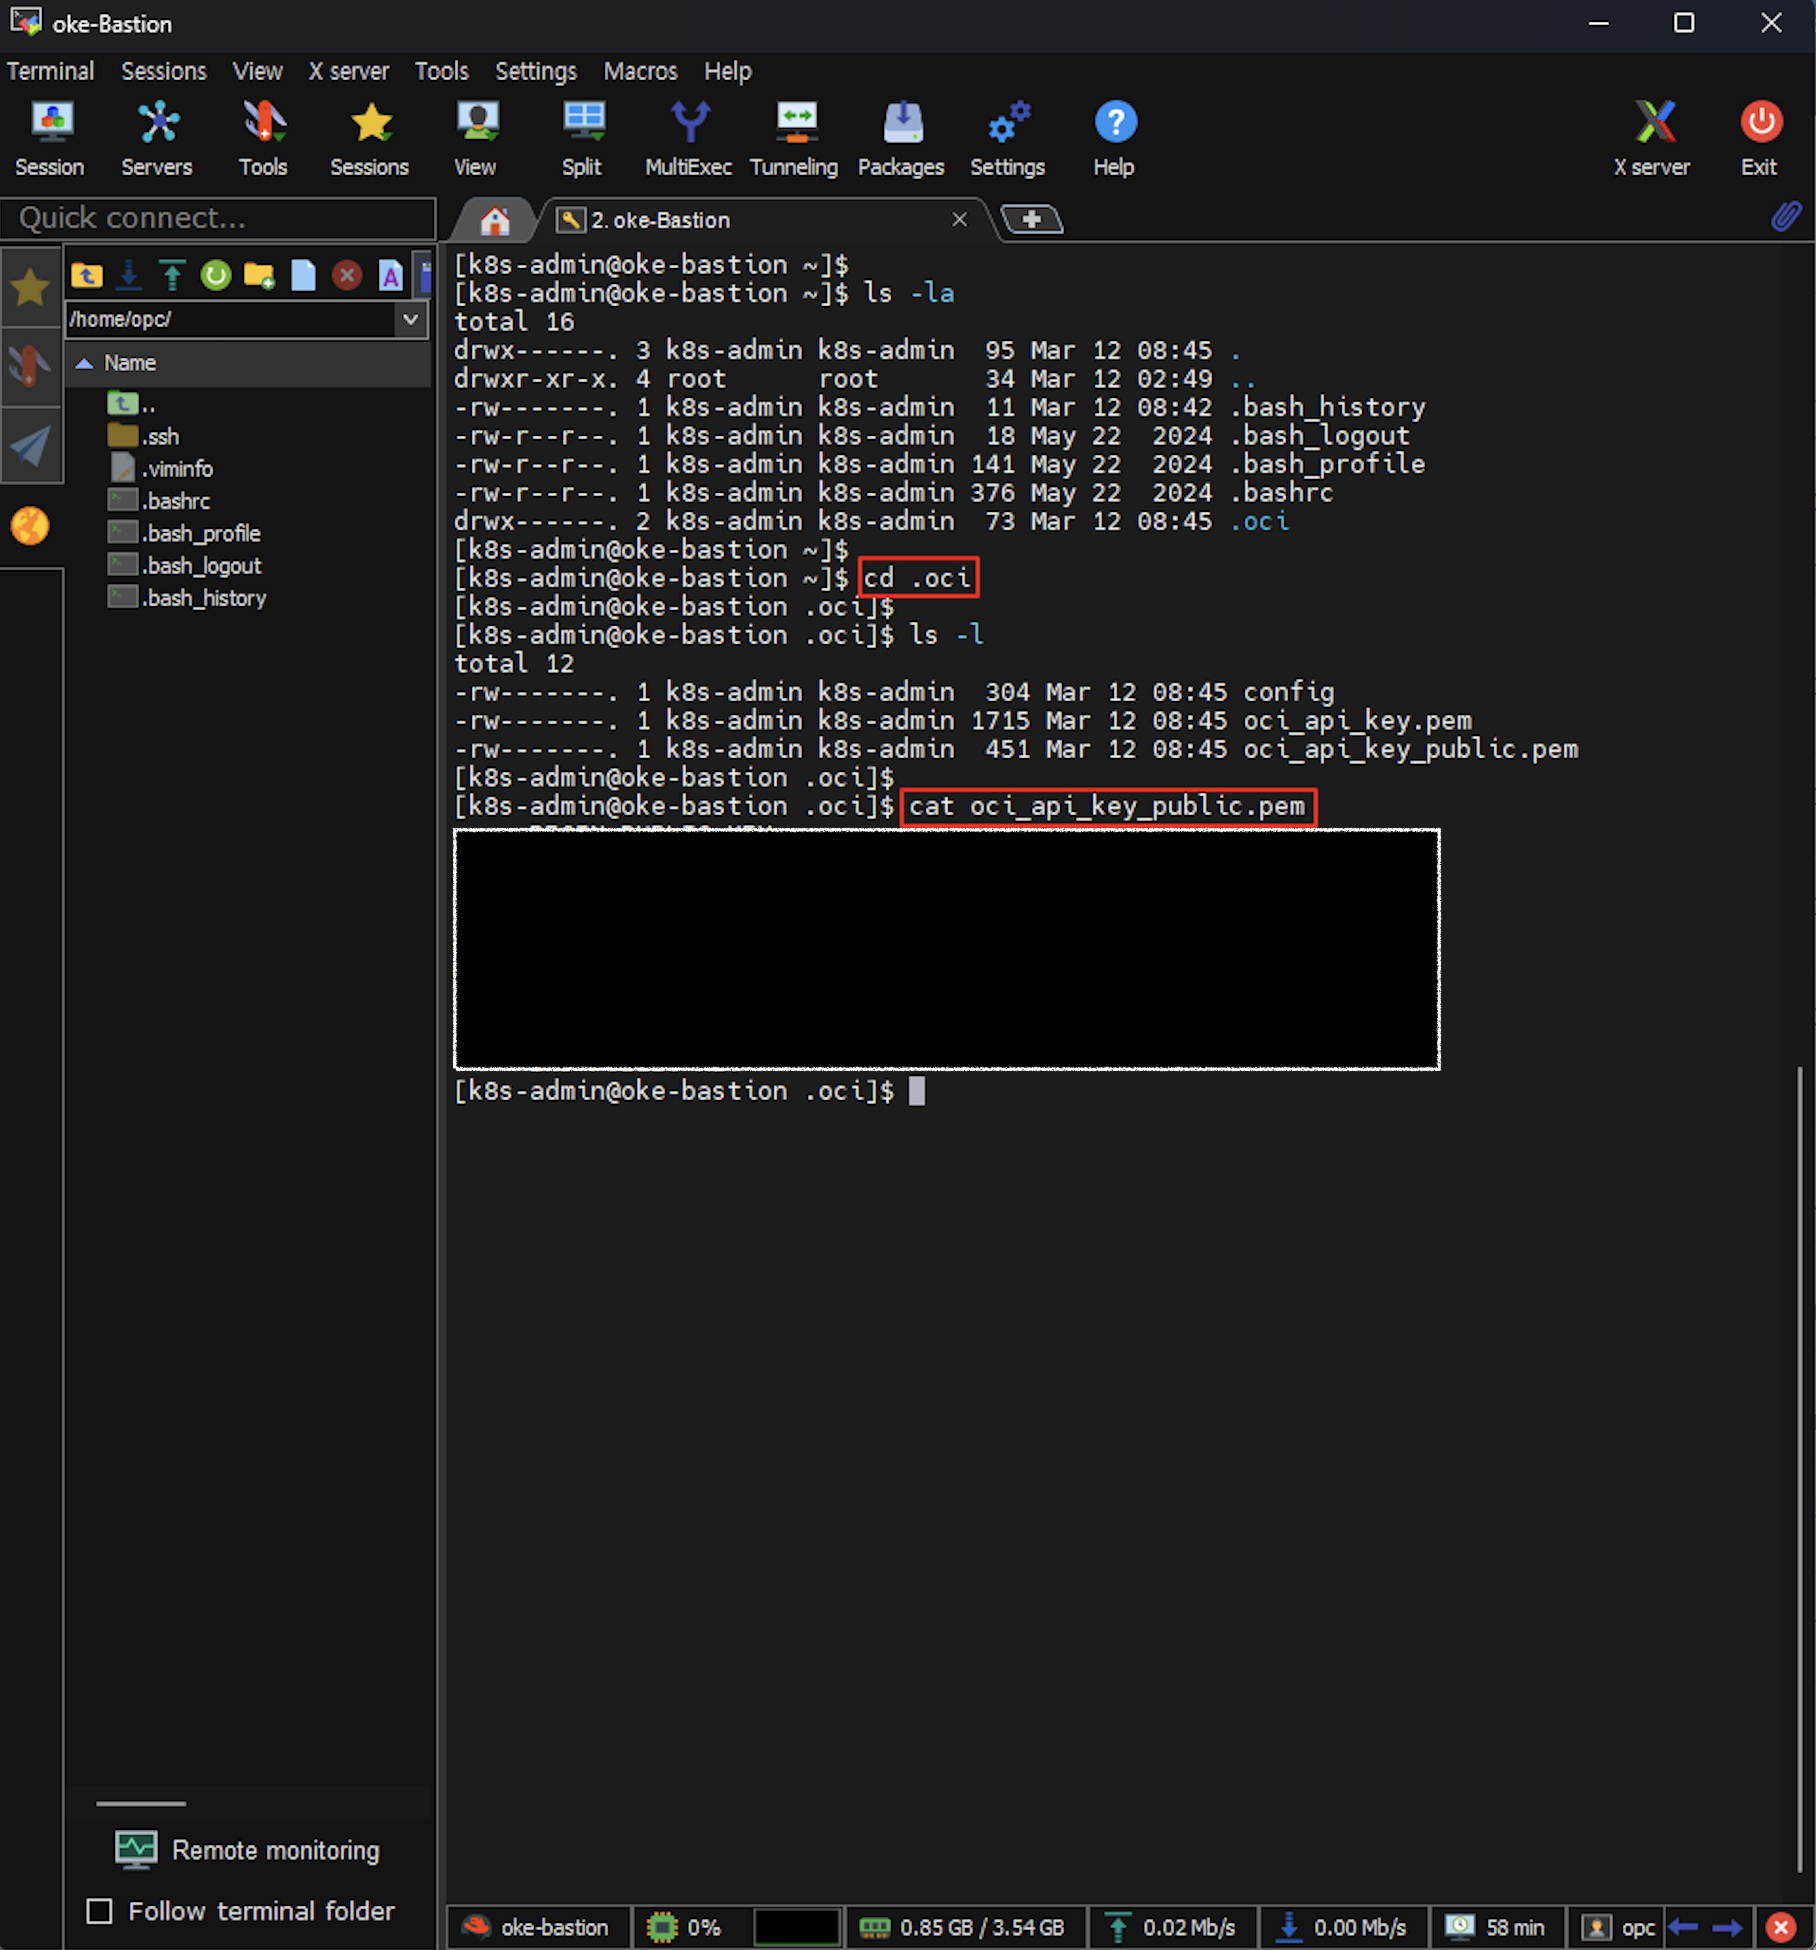
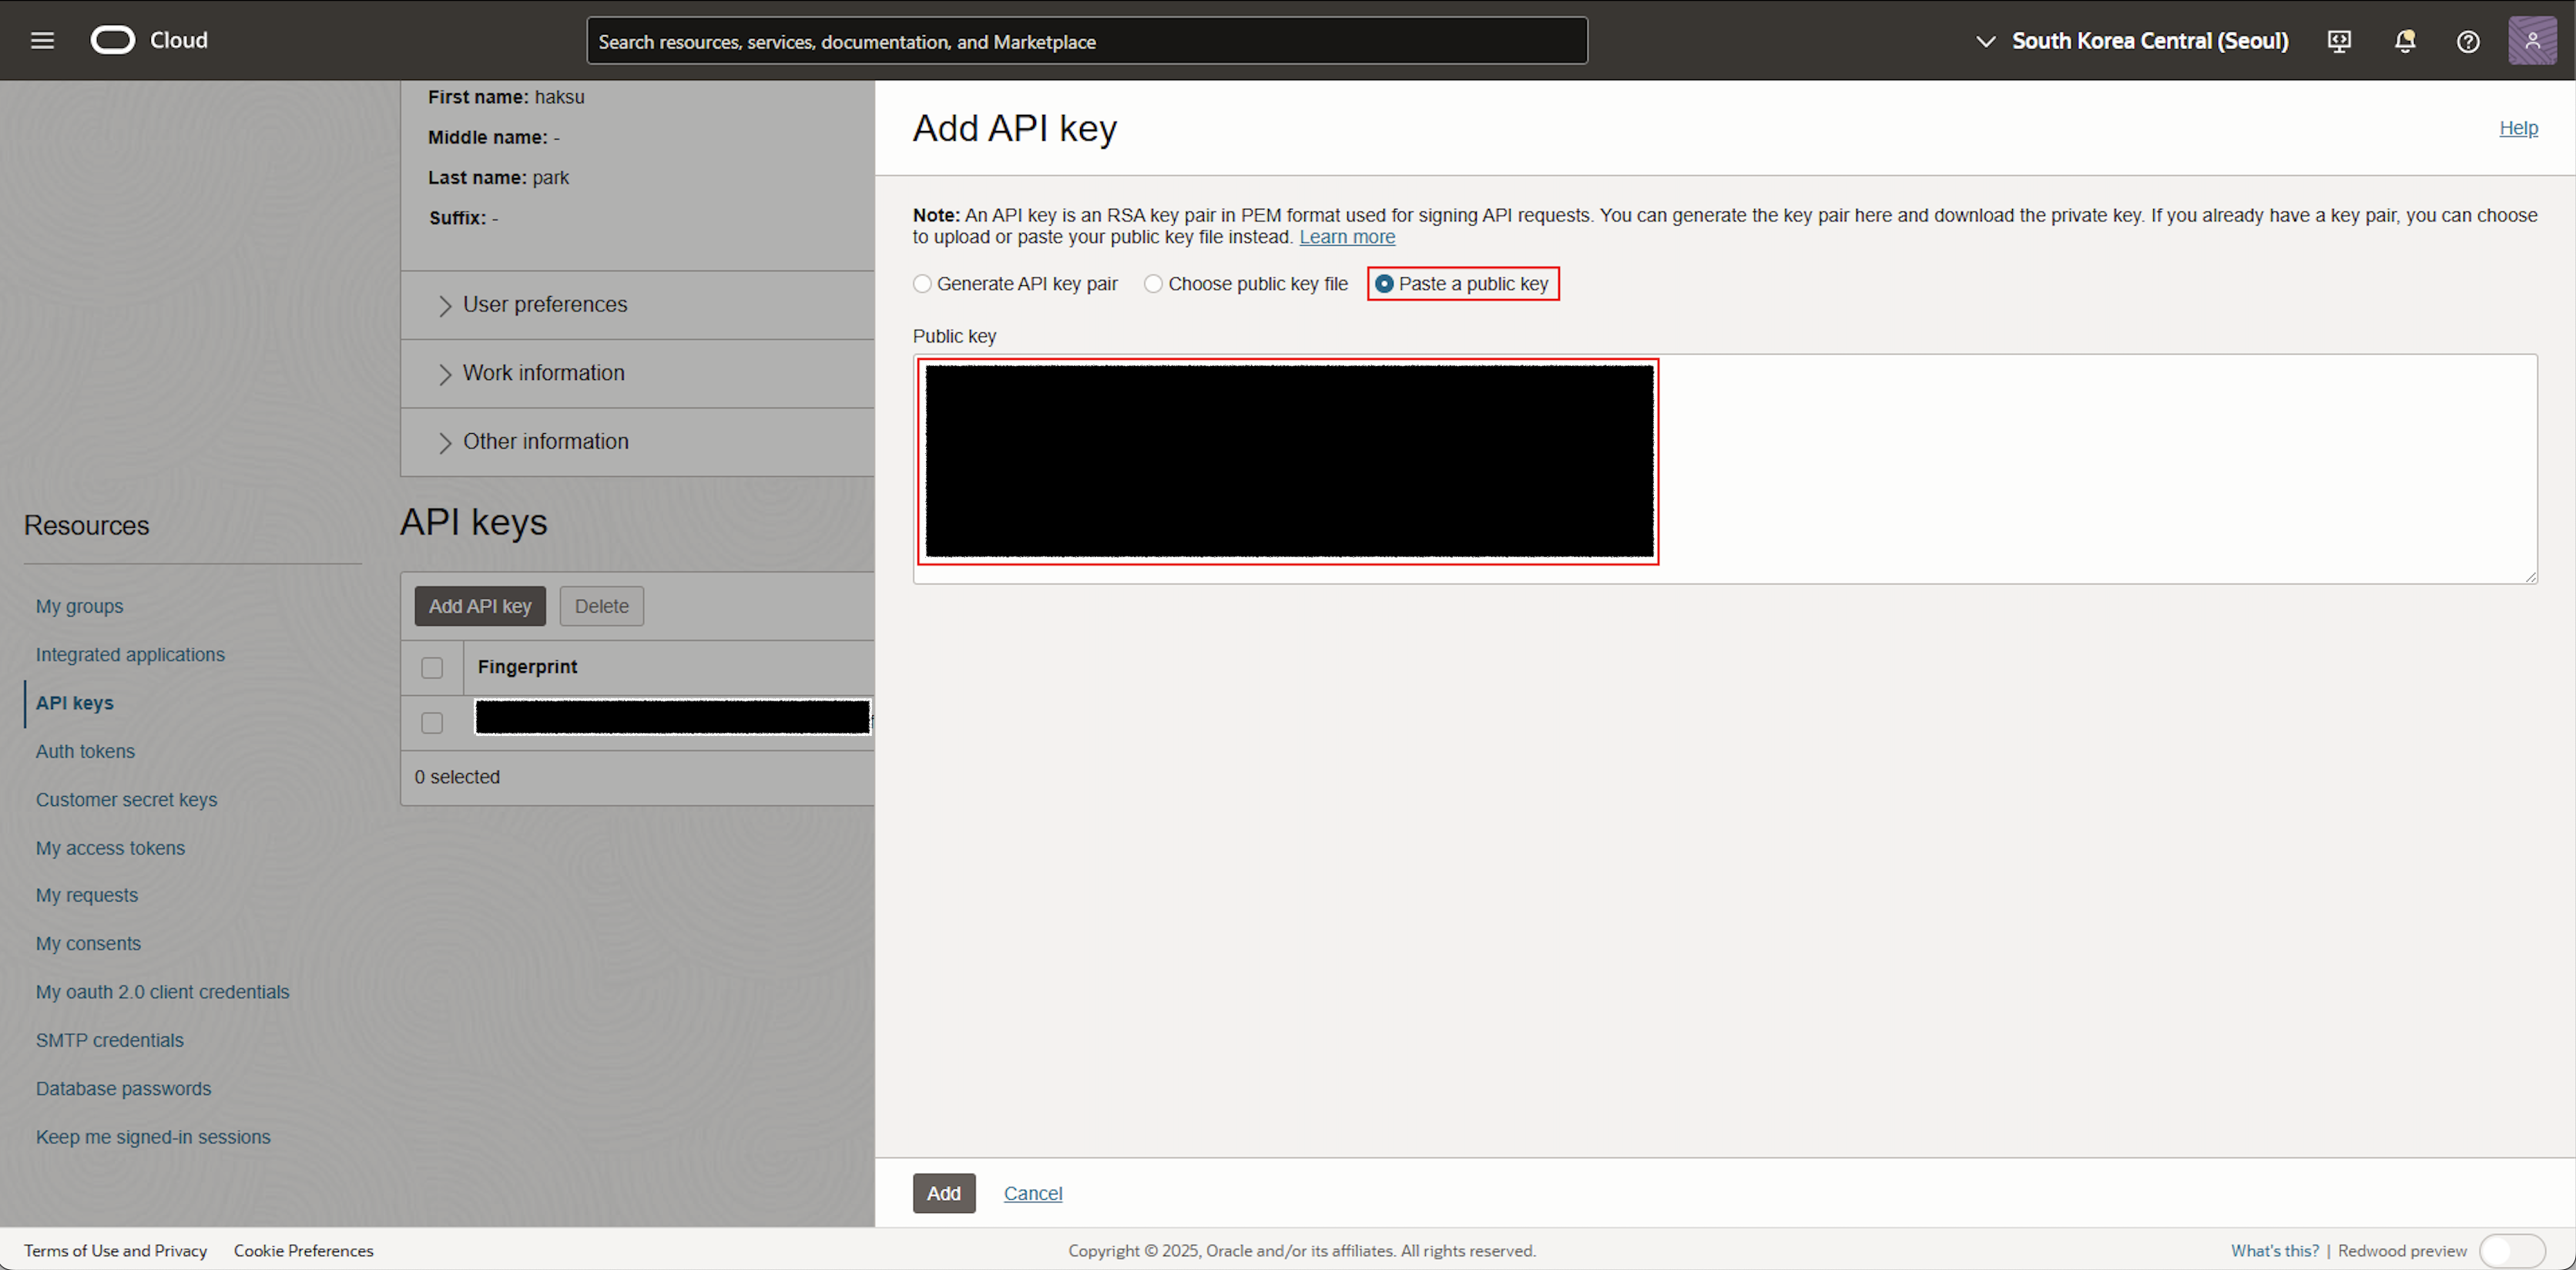
2. 우측 상단 Profile -> <계정명> 클릭
3. 좌측 하단 Resourecs -> API keys 클릭
4. Paste a public key 선택 -> 복사한 API Public key 붙여넣기
5. API 연동 확인
## 테넌시의 Object Storage namespace 출력
[k8s-admin@oke-bastion .oci]# oci os ns get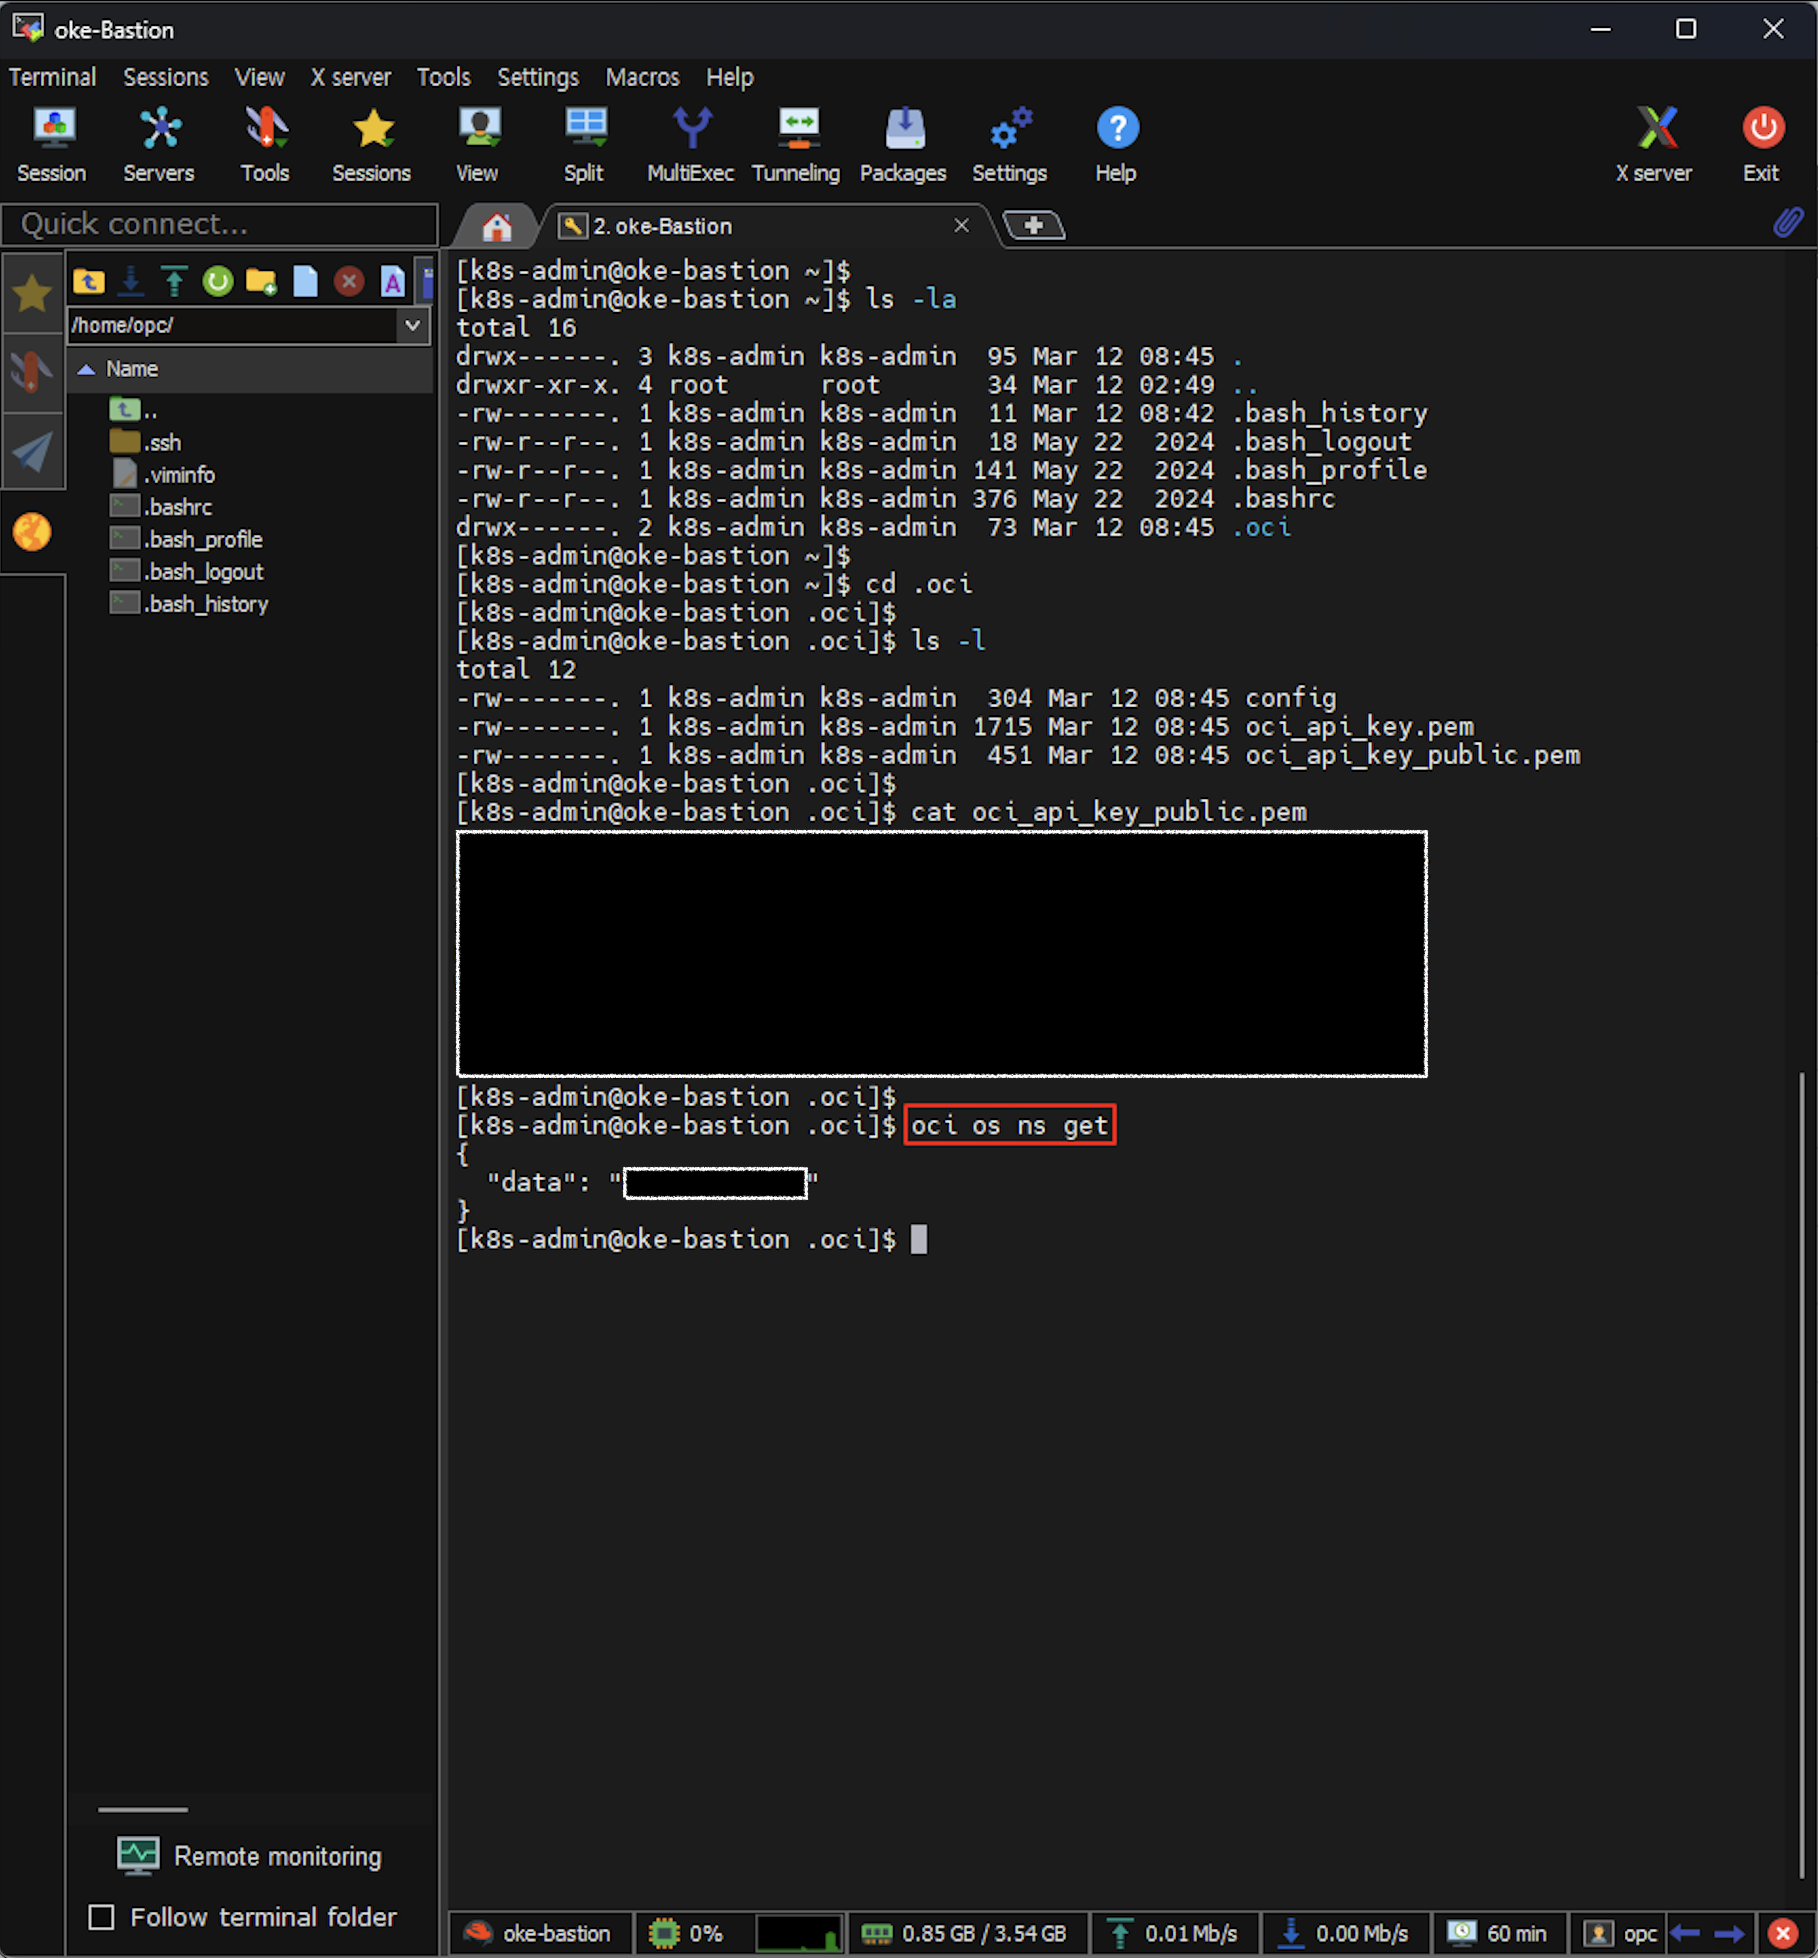

3. kubectl
3.1. kubectl 바이너리 파일 다운
[k8s-admin@oke-bastion ~]$ curl -LO "https://dl.k8s.io/release/$(curl -L -s https://dl.k8s.io/release/stable.txt)/bin/linux/amd64/kubectl"
3.2. kubectl 설치
## kubectl 설치
[k8s-admin@oke-bastion ~]$ sudo install -o root -g root -m 0755 kubectl /usr/local/bin/kubectl

## 설치된 kubectl 버전 확인
[k8s-admin@oke-bastion ~]$ kubectl version --client --output=yaml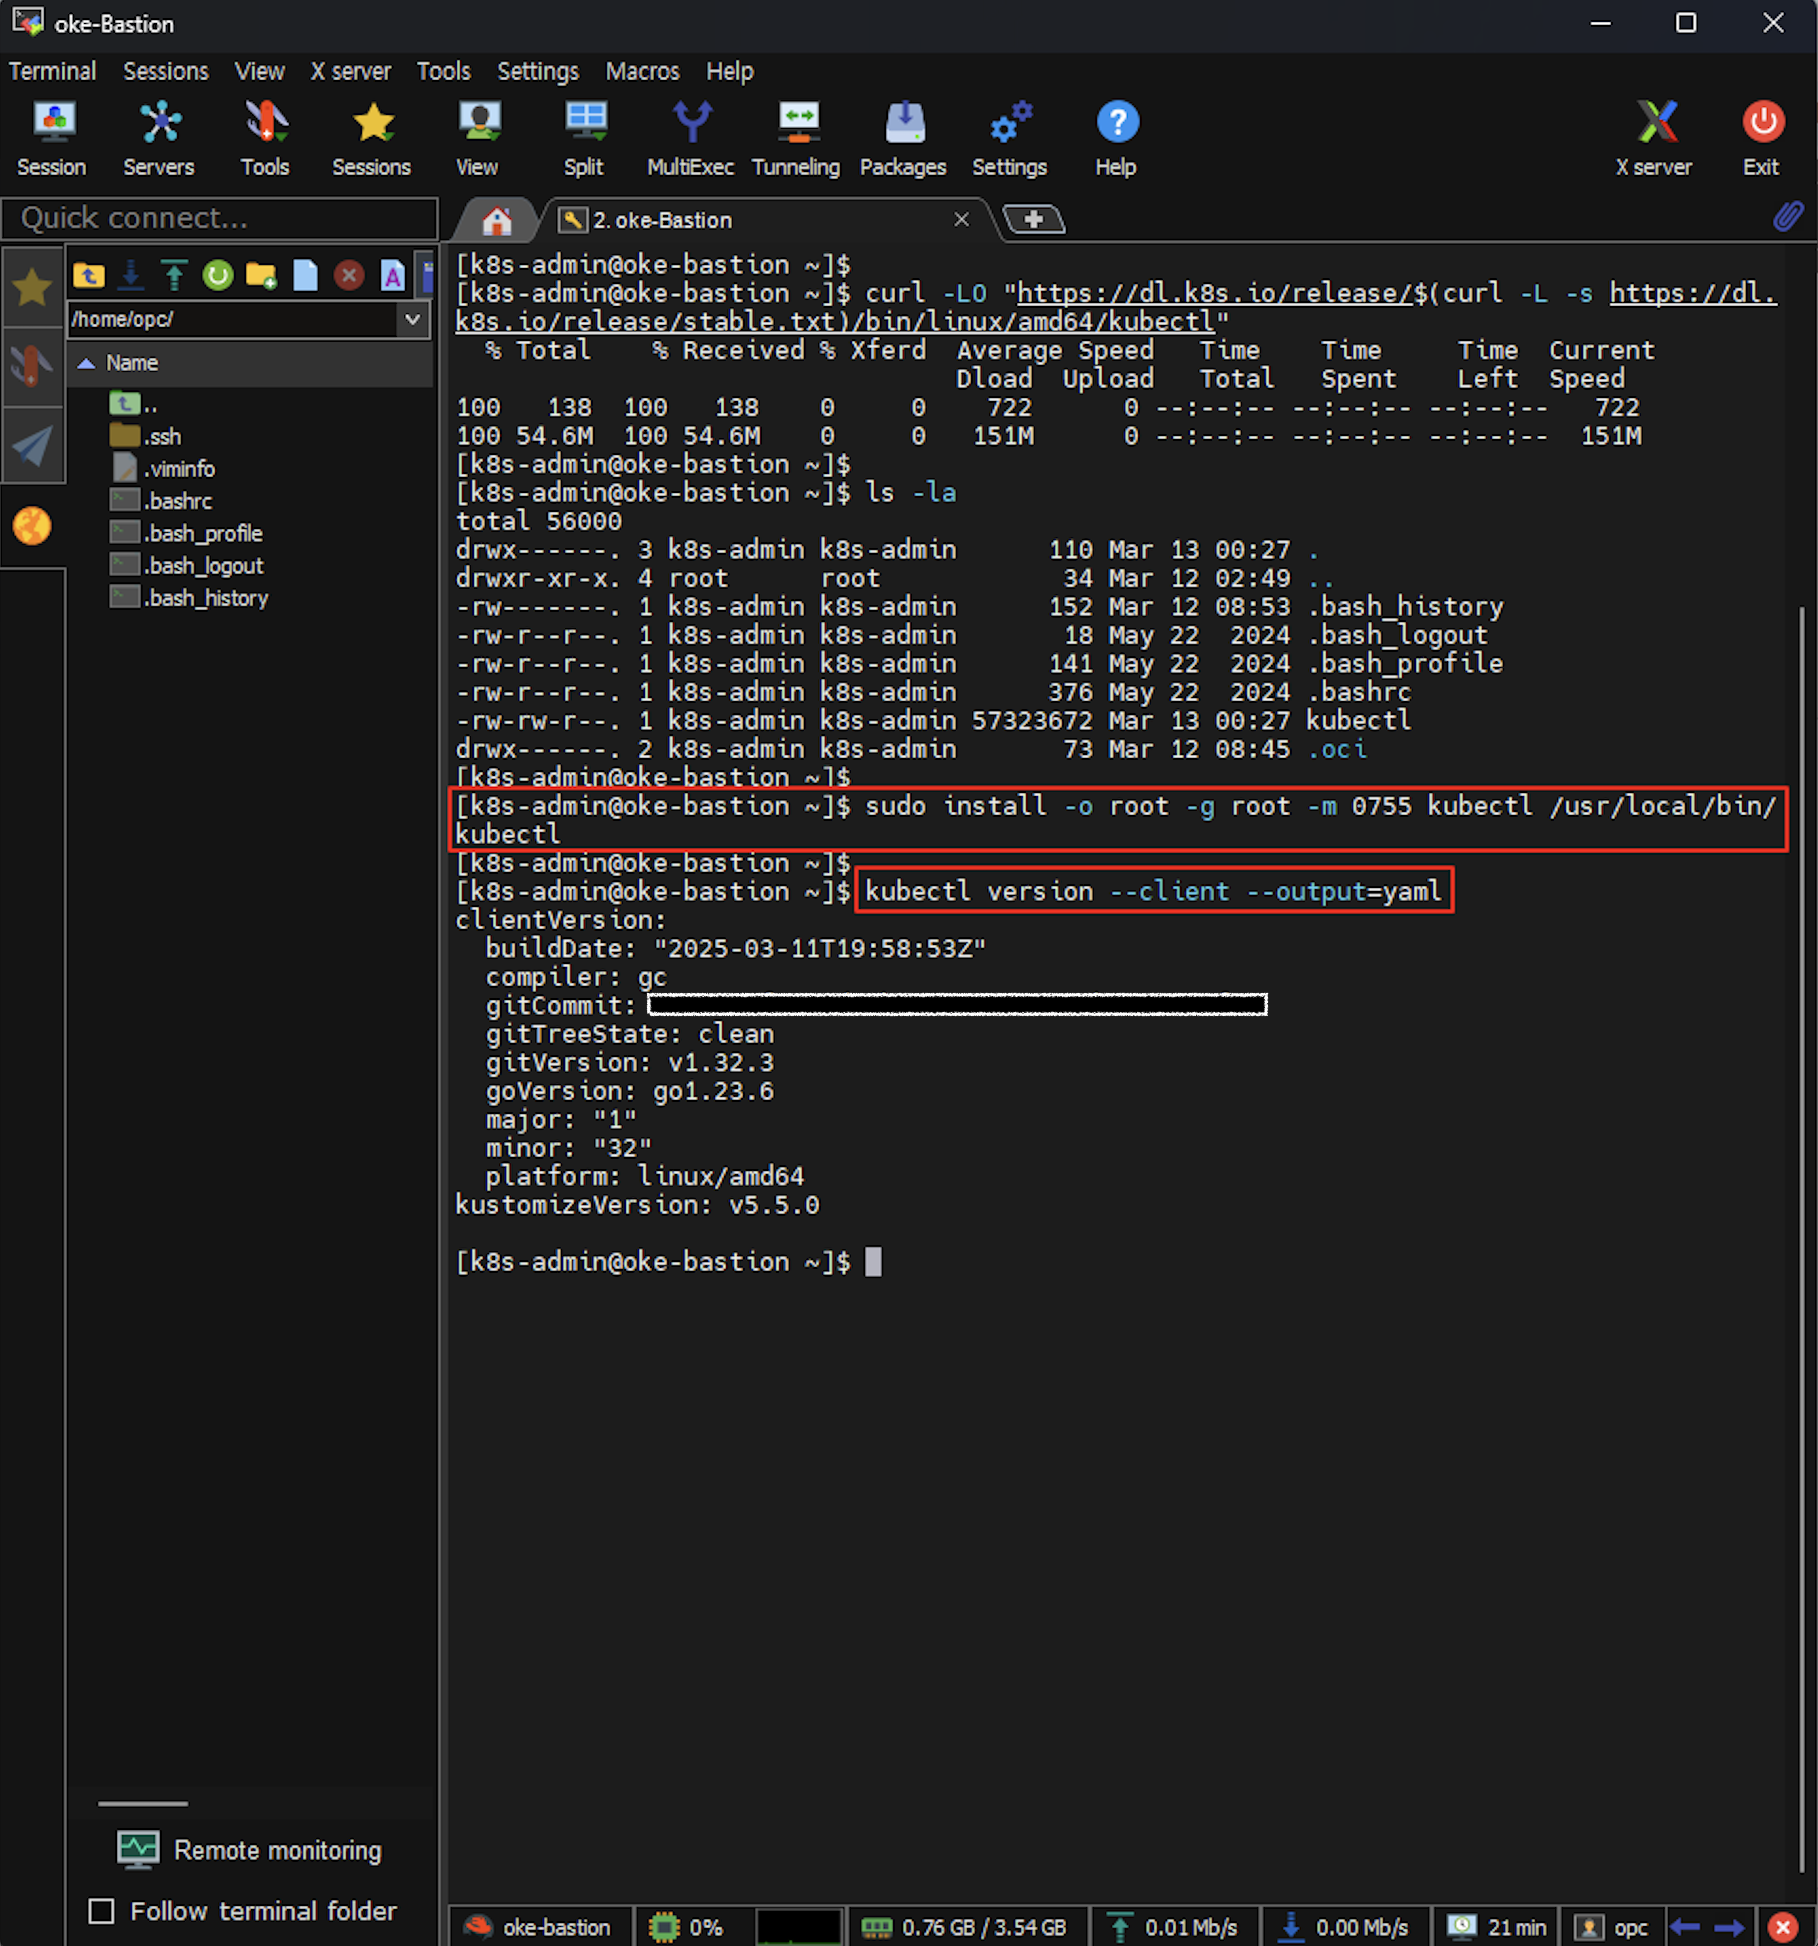
3.3. kubeconfig 생성
1. 생성한 OKE Cluster -> Access Cluster 클릭
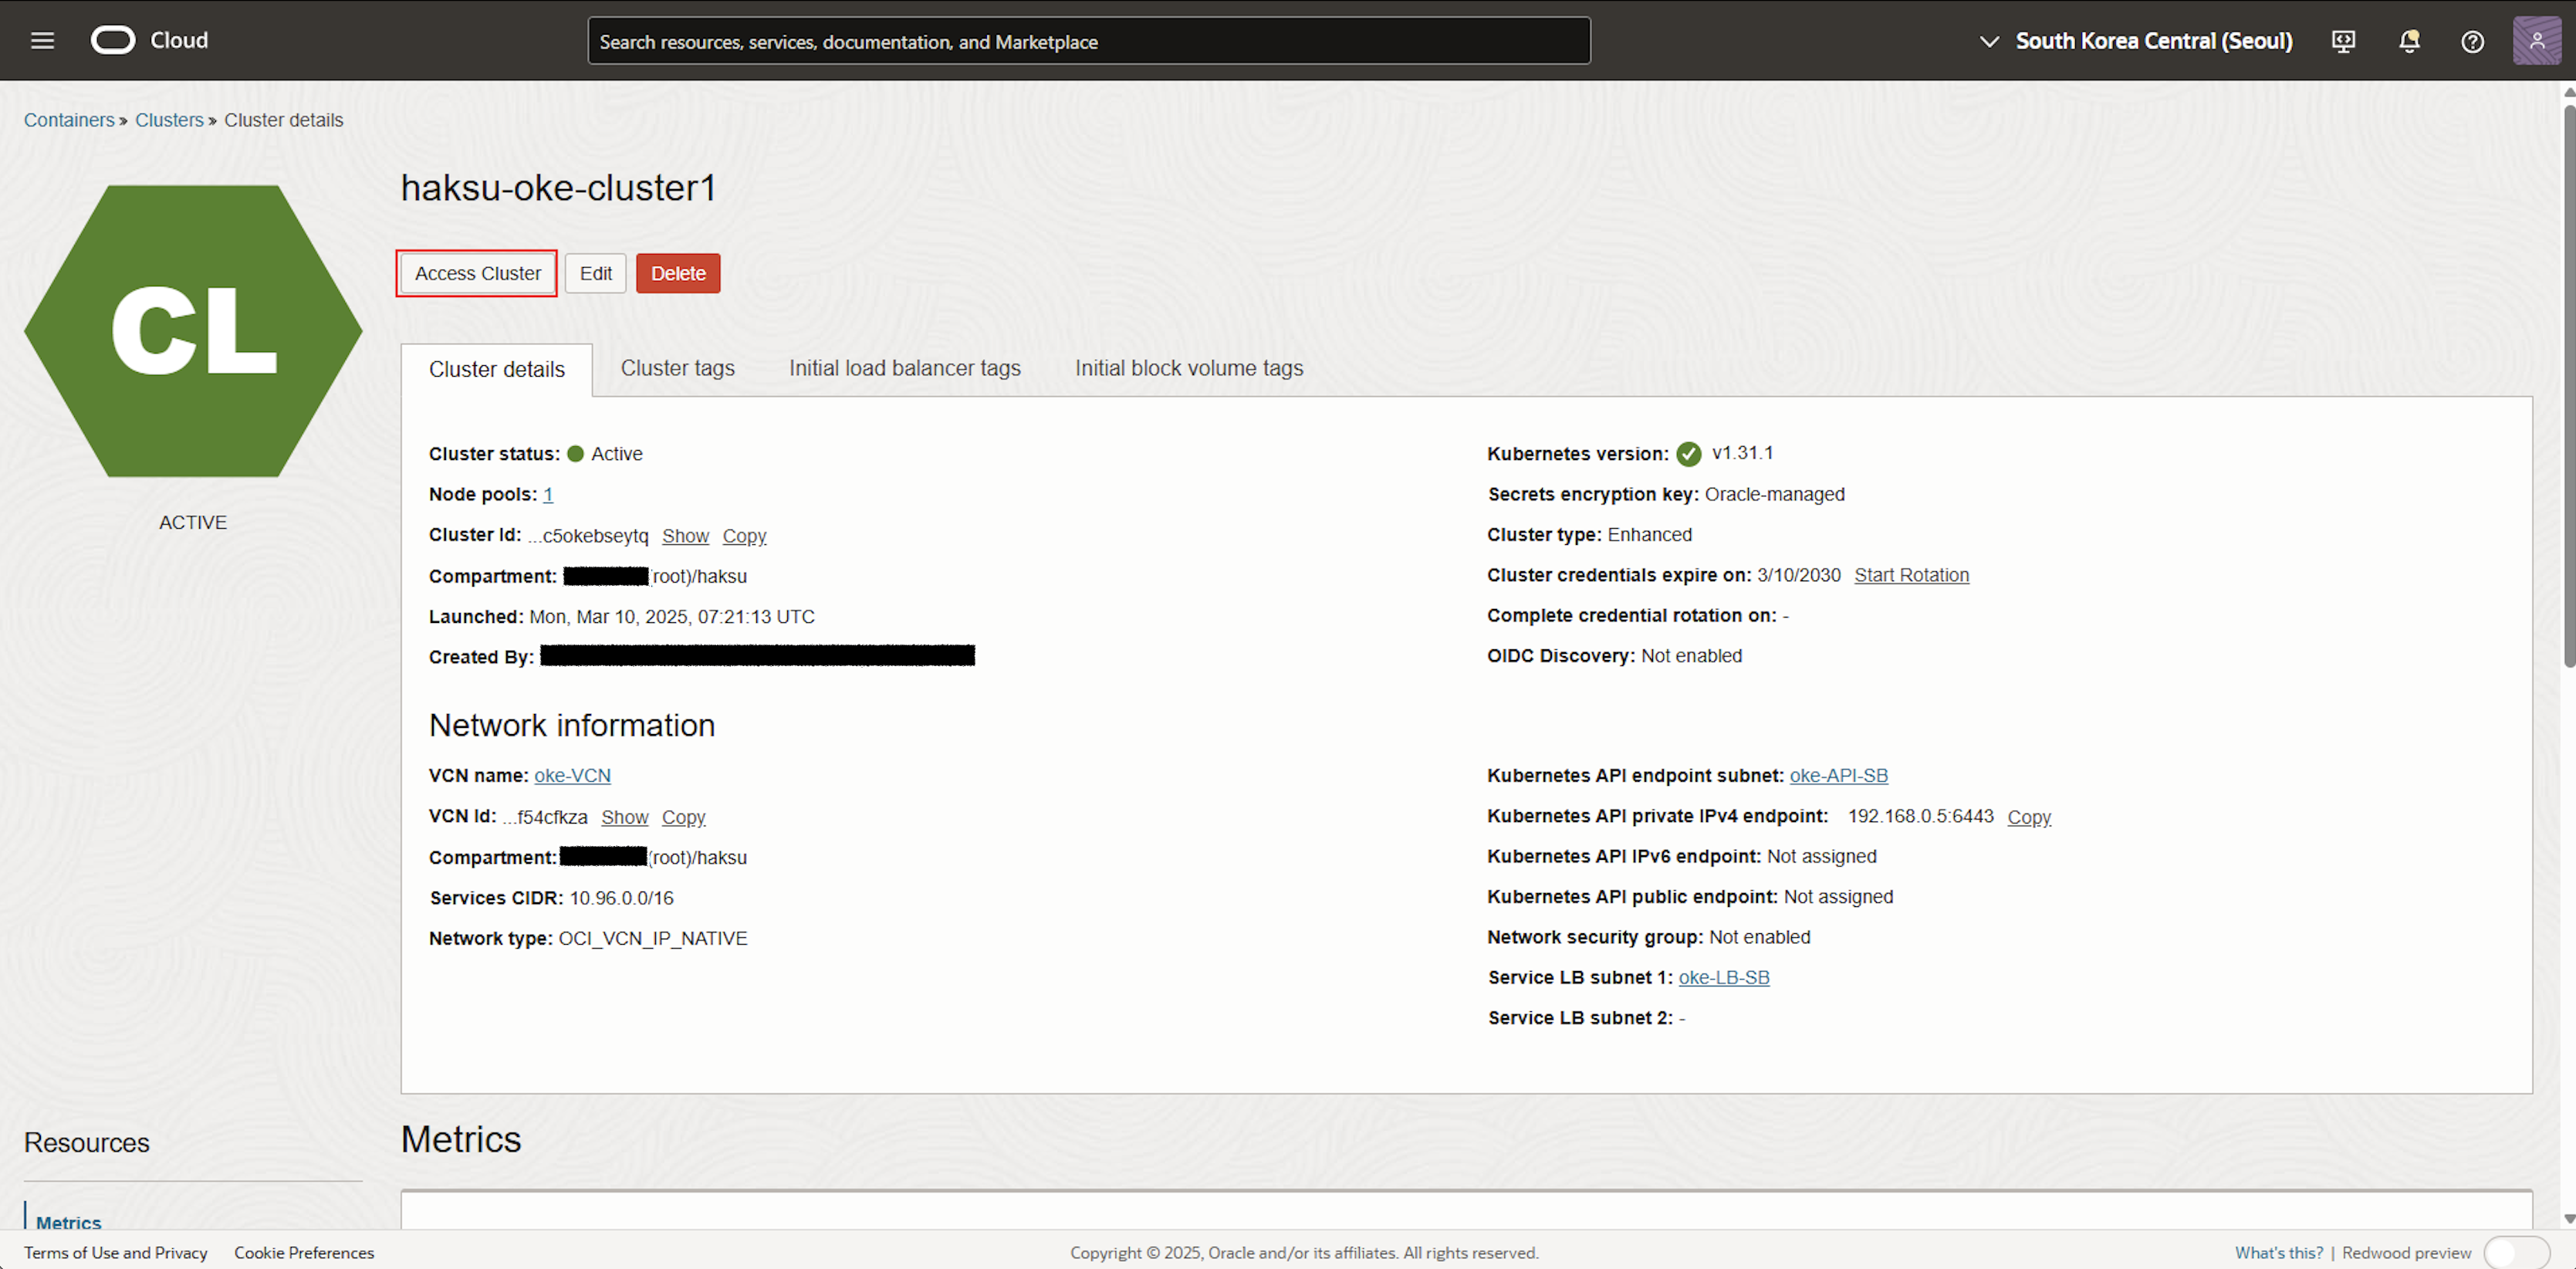
2. Local Access -> 단계 별 수행
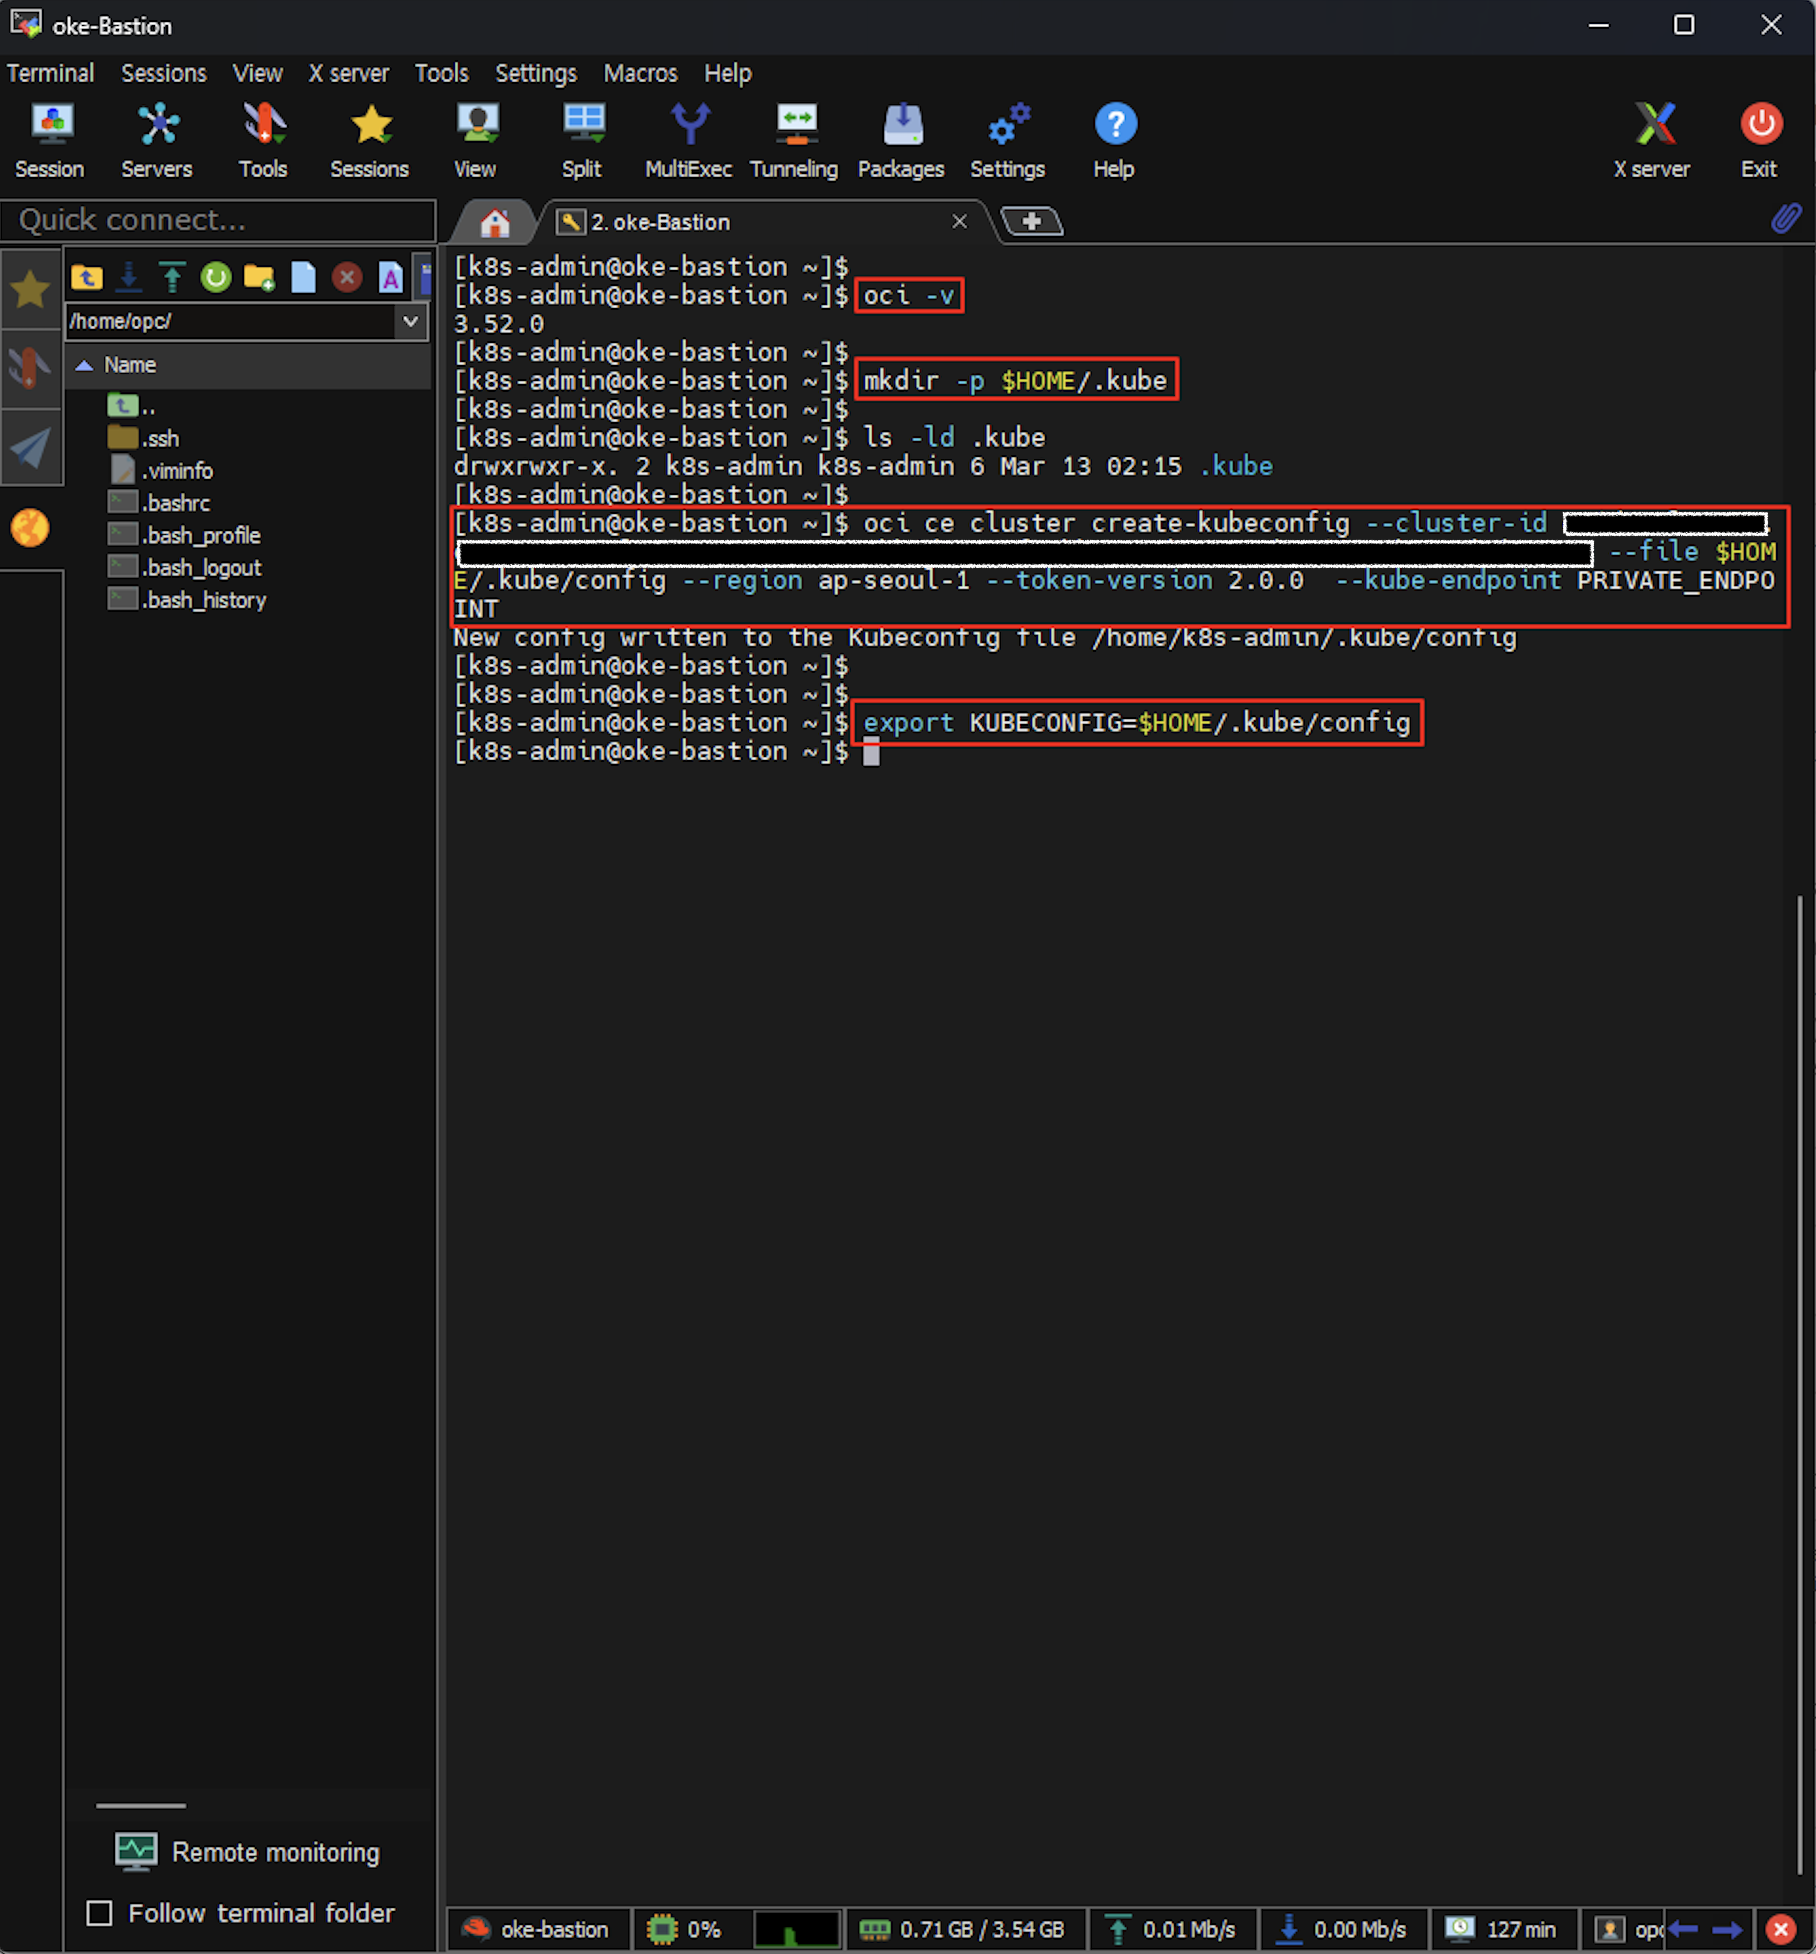
## OCI CLI 설치 확인
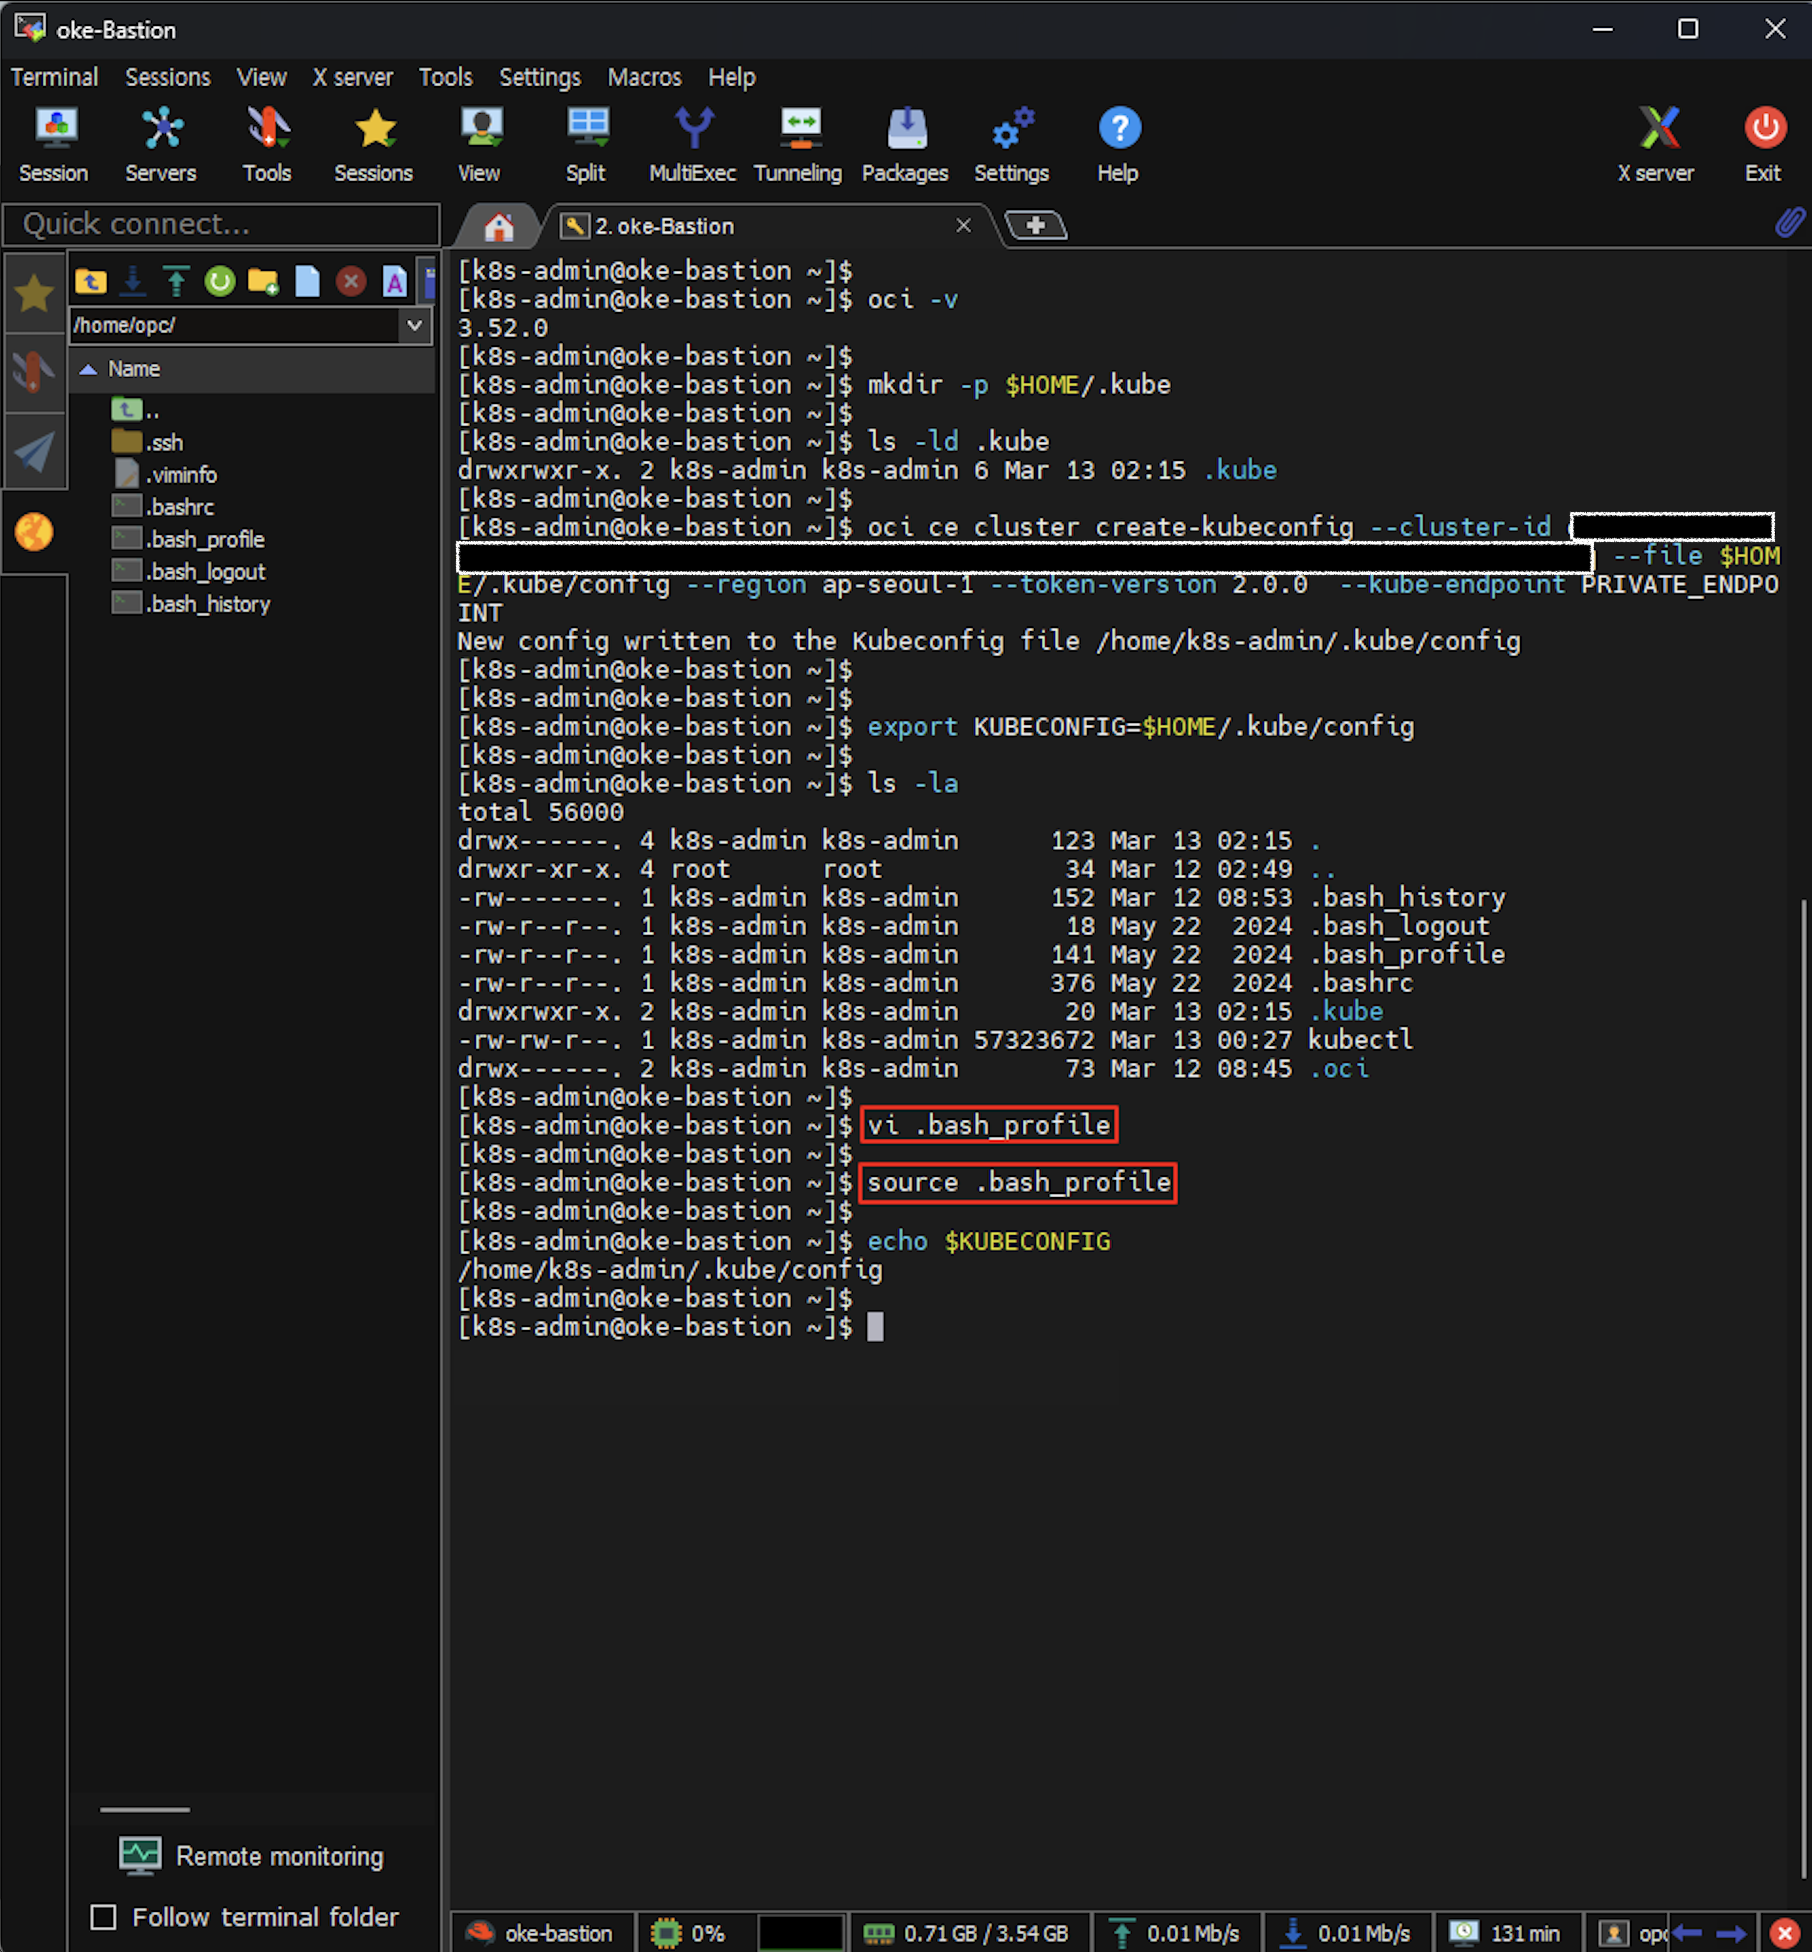
[k8s-admin@oke-bastion ~]$ oci -v
## kubeconfig 파일이 포함되는 디렉터리 생성
[k8s-admin@oke-bastion ~]$ mkdir -p $HOME/.kube
## kubeconfig 생성
[k8s-admin@oke-bastion ~]$ oci ce cluster create-kubeconfig --cluster-id <Cluster OCID> --file $HOME/.kube/config --region ap-seoul-1 --token-version 2.0.0 --kube-endpoint PRIVATE_ENDPOINT
## kubeconfig 경로 환경변수 지정
## (.bash_profile 등록 필요)
[k8s-admin@oke-bastion ~]$ export KUBECONFIG=$HOME/.kube/config
* 환경변수 영구 등록
- 사용자의 .bash_profile 파일에 등록 필요
## .bash_profile 수정
[k8s-admin@oke-basion ~]$ vi .bash_profile
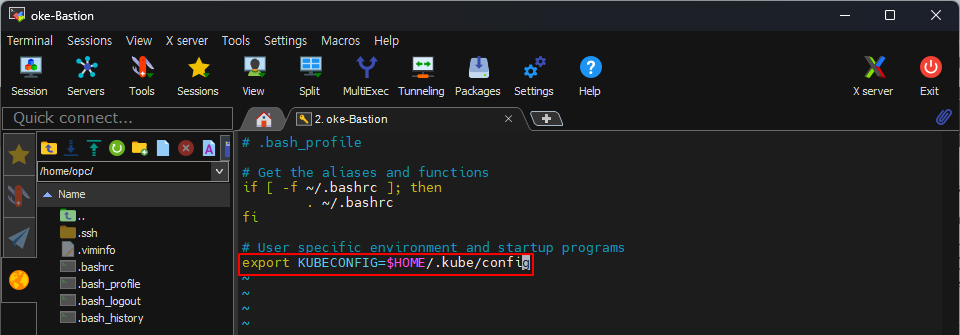
## vi편집기로 아래 내용 입력
export KUBECONFIG=$HOME/.kube/config
## .bash_profile 적용
[k8s-admin@oke-basion ~]$ source .bash_profile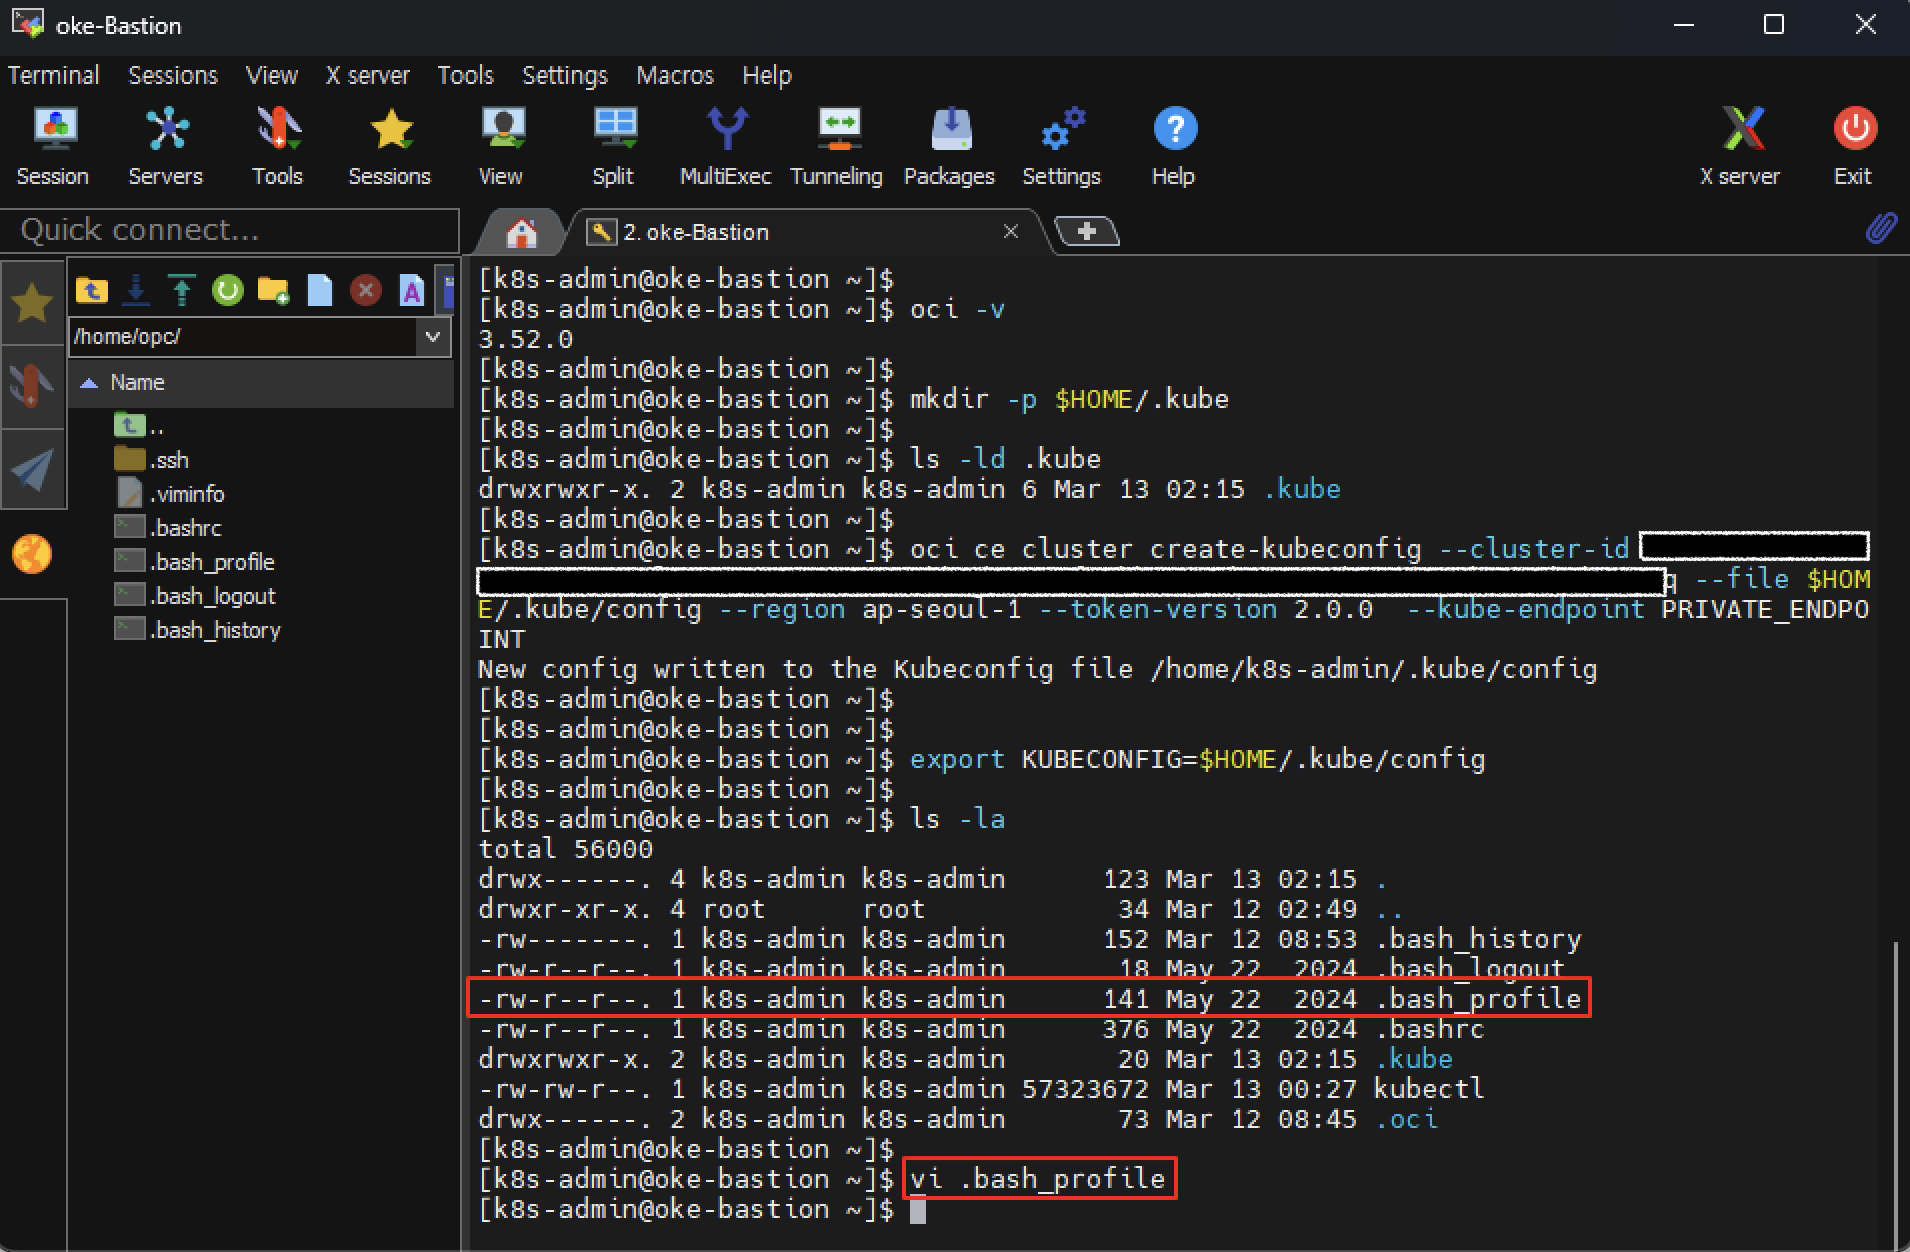
3.4. kubeconfig 생성 확인
## 생성된 파일 확인
## (context 정보 확인 가능)
[root@oke-bastion ~]# more $HOME/.kube/config
4. 클러스터 조회
4.1. 클러스터 정보 조회
[k8s-admin@oke-bastion ~]$ kubectl cluster-info
4.2. Worker nodes 정보 조회
[root@oke-bastion ~]# kubectl get nodes
리눅스에 kubectl 설치 및 설정
시작하기 전에 클러스터의 마이너(minor) 버전 차이 내에 있는 kubectl 버전을 사용해야 한다. 예를 들어, v1.32 클라이언트는 v1.31, v1.32, v1.33의 컨트롤 플레인과 연동될 수 있다. 호환되는 최신 버전
kubernetes.io